


Donate Now
and become
Forum Supporter.

Many perks!
<...more...>


|

11-19-2018, 06:46 PM
|
|
Member
|
|
Join Date: May 2018
Posts: 59
|
|
 The Jungle - ExoTerra Large
I decided to take on a slightly larger (much larger!) project and replace my 3ft fish tank in the lounge room. Even though I have loved watching the tank grow and flourish, the amount of time spent on water changes, trimming, rising electricity cost, risks of pipes leaking while away, etc, made it necessary to decommission it.
Enter stage left: The perfect opportunity to set up another ochidarium!!
And to my partners relief, it wasn't going to take up anymore room, a double win!!
I hadn't tried anything this big before so it was a real learning curve. For one, there were only 3-4 ExoTerra Large tanks available in Australia, so sourcing one of those at a reasonable price took quite some time.
I built (with the help of a talented friend) a custom stand for the tank with a really clever hidden door for all the equipment so this build really was from the ground up which made it all the more enjoyable.
Another hurdle was that I wanted to create an all cork background and fill the gaps with Sphagnum As there is only 2-3 places in the whole of Australia that I found had a good stock of cork, a flight interstate was in order to purchase a large supply of pieces i needed (i coincided with a family function so it worked out perfectly)
The Mistking system and a few other bits I had purchased from America and luckily was over there for a holiday a few months ago so I was able to bring it all back with me.
We really face a number of problems with supplies for terrarium building here in Australia but despite the MANY headaches and brick walls, the end result was all the more rewarding.
The project is now nearly completed with just the lighting hood and permanent lighting to be put in place but I thought I would put some photos up of the build as I loved watching this tank come together over the last 3 months.
Please comment with any things you would have done differently, problems you can forsee or if any plants should be moved to a different area, your knowledgeable opinions are always welcome 
[IMG] 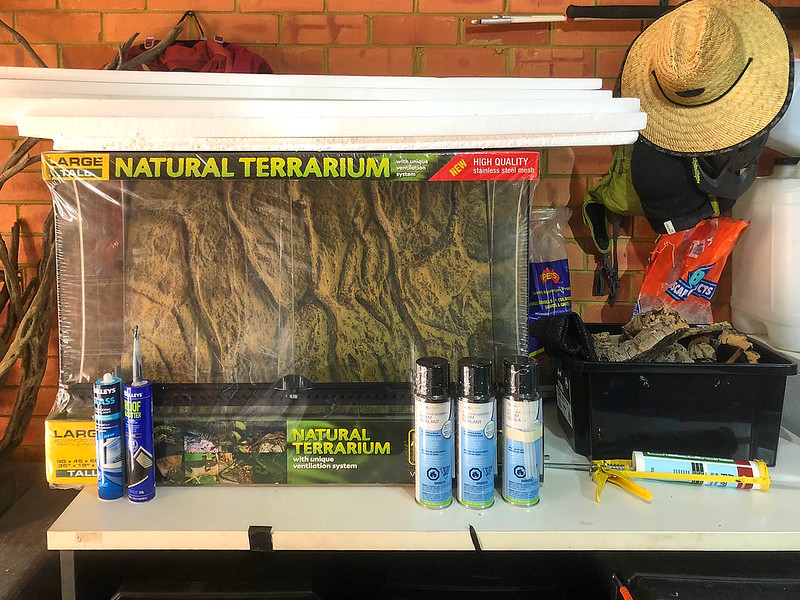 181008_Vivarium3_002 181008_Vivarium3_002 by David Burgess, on Flickr[/IMG]
[IMG] 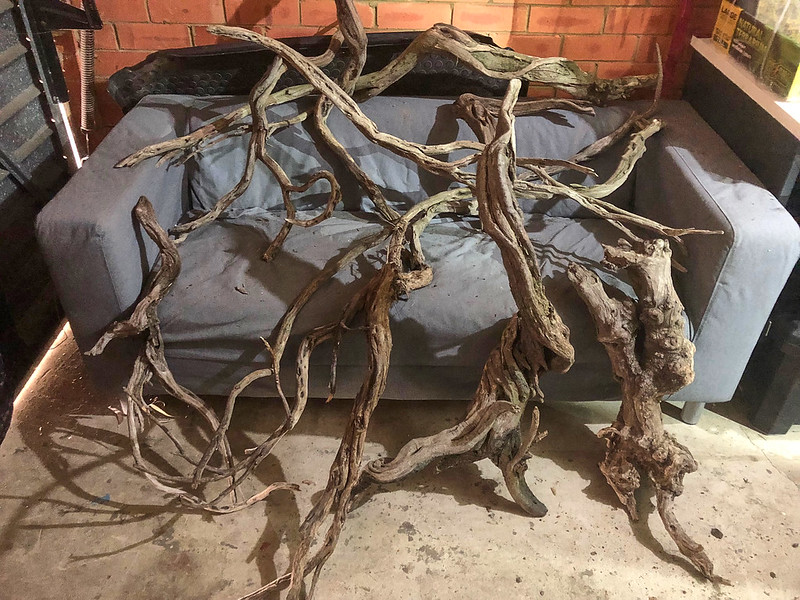 181008_Vivarium3_004 181008_Vivarium3_004 by David Burgess, on Flickr[/IMG]
[IMG]  181008_Vivarium3_012 181008_Vivarium3_012 by David Burgess, on Flickr[/IMG]
[IMG] 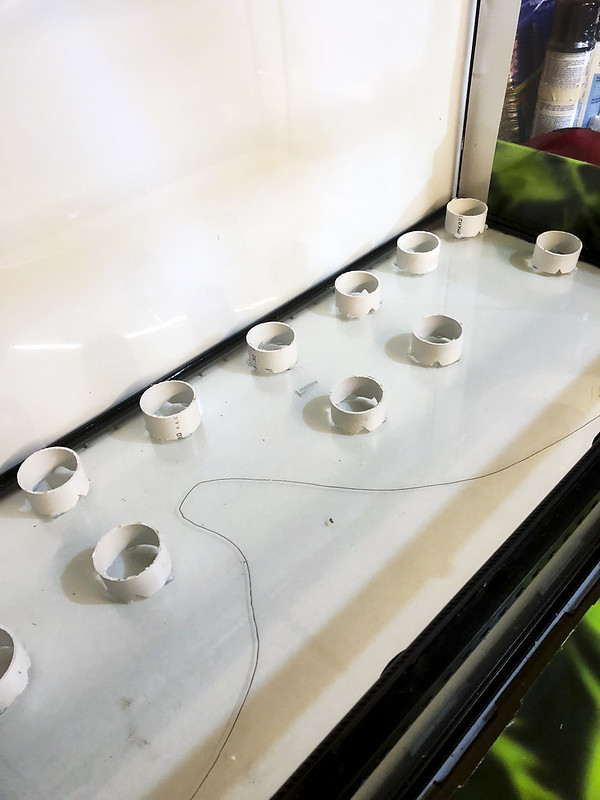 Vivarioum_FalseBottom_002 Vivarioum_FalseBottom_002 by David Burgess, on Flickr[/IMG]
[IMG] 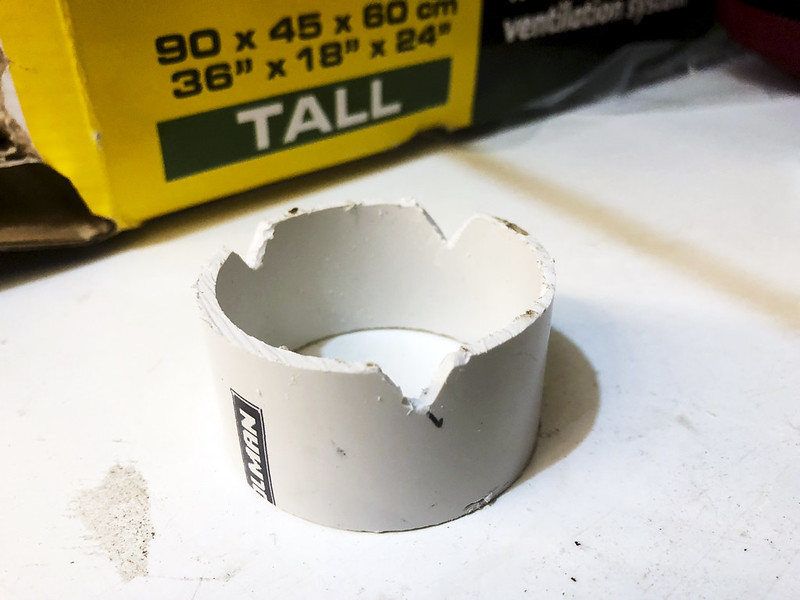 Vivarioum_FalseBottom_006 Vivarioum_FalseBottom_006 by David Burgess, on Flickr[/IMG]
[IMG]  Vivarioum_FalseBottom_008 Vivarioum_FalseBottom_008 by David Burgess, on Flickr[/IMG]
[IMG] 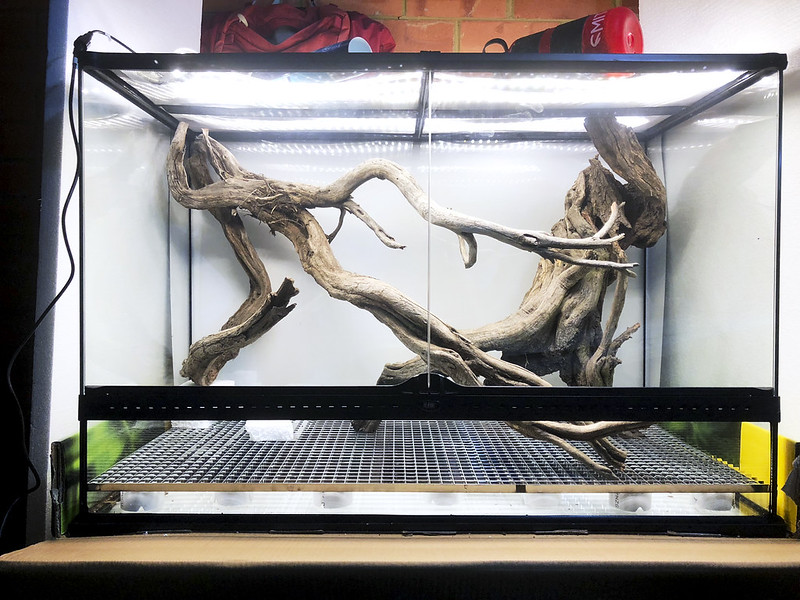 Vivarioum_FalseBottom_014 Vivarioum_FalseBottom_014 by David Burgess, on Flickr[/IMG]
[IMG] 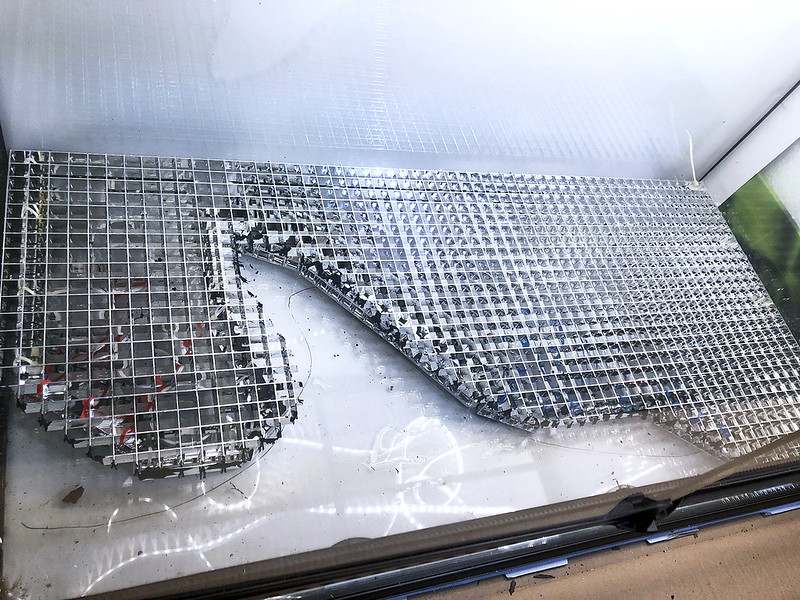 181008_Vivarium3_019 181008_Vivarium3_019 by David Burgess, on Flickr[/IMG]
[IMG] 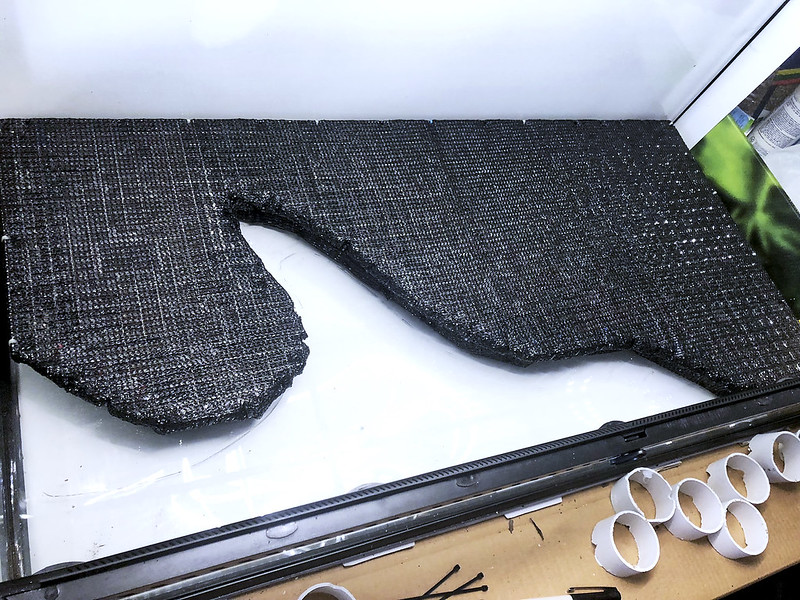 181008_Vivarium3_022 181008_Vivarium3_022 by David Burgess, on Flickr[/IMG]
[IMG] 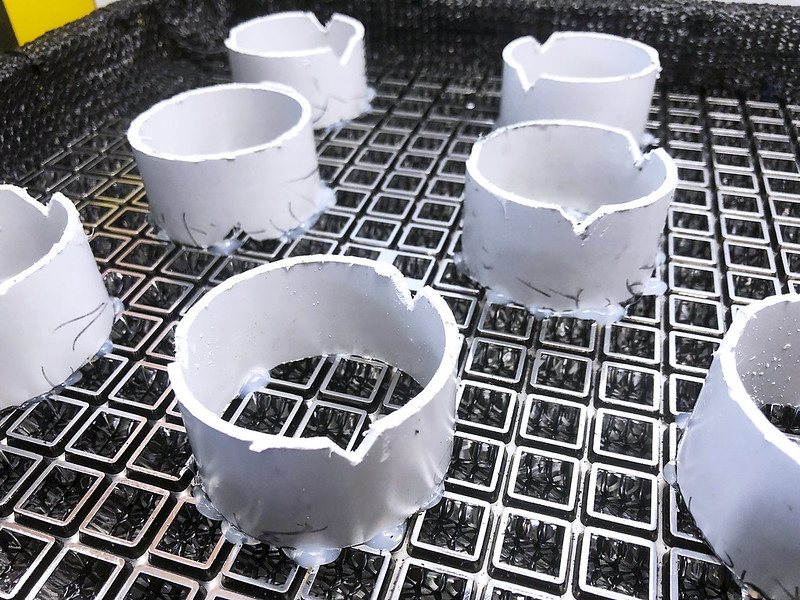 181008_Vivarium3_031 181008_Vivarium3_031 by David Burgess, on Flickr[/IMG]
[IMG] 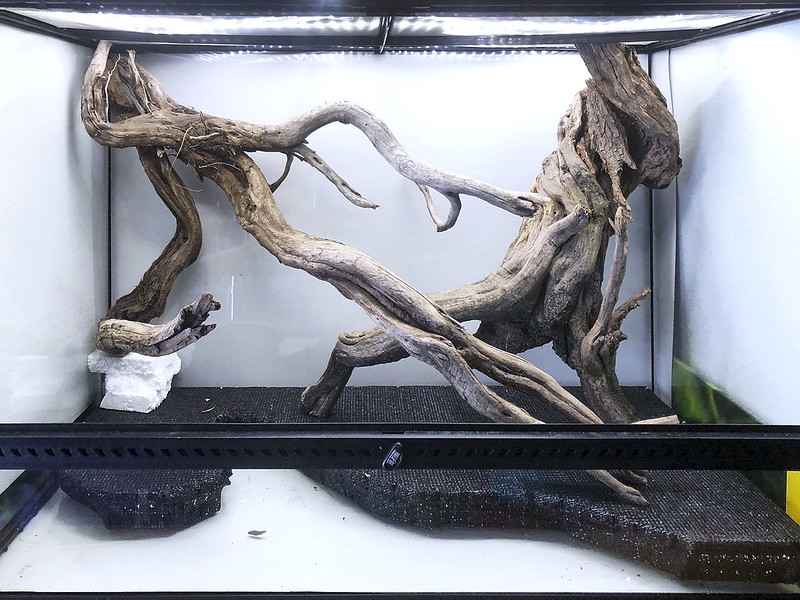 181008_Vivarium3_033 181008_Vivarium3_033 by David Burgess, on Flickr[/IMG]
 |
 |
 |
 |
 Mistking
|

Looking for a misting system? Look no further. Automated misting systems from MistKing are used by multitude of plant enthusiasts and are perfect for Orchids. Systems feature run dry pumps, ZipDrip valve, adjustable black nozzles, per second control! Automatically mist one growing shelf or a greenhouse full of Orchids.
See MistKing testimonials |
|
 |
 |
 |
 |

|
|
Post Thanks / Like - 1 Likes
|
|
|
|
|
11-19-2018, 09:57 PM
|
|
Member
|
|
Join Date: May 2018
Posts: 59
|
|
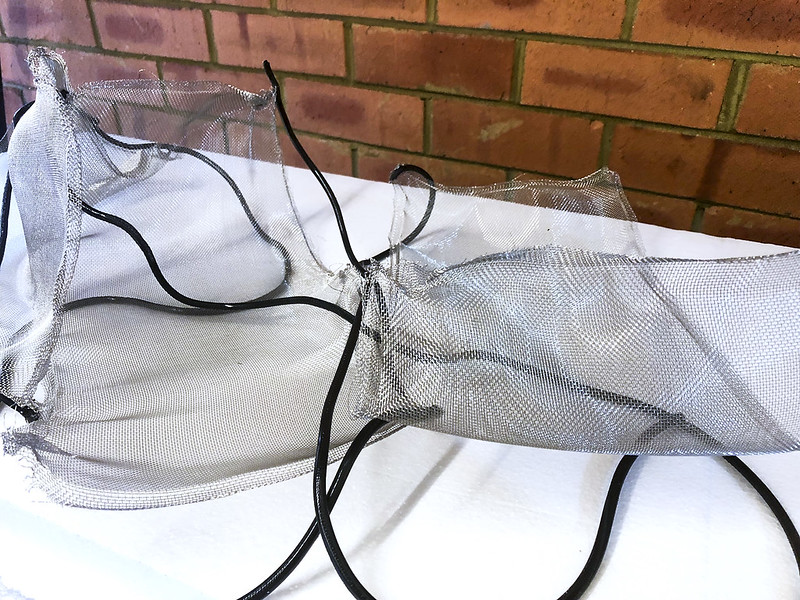 [url=https://flic.kr/p/Q6bTg1]
Mesh was taken out of the Exoterra lid and replaced vwith glass panels
 [url=https://flic.kr/p/2b8gwpW]
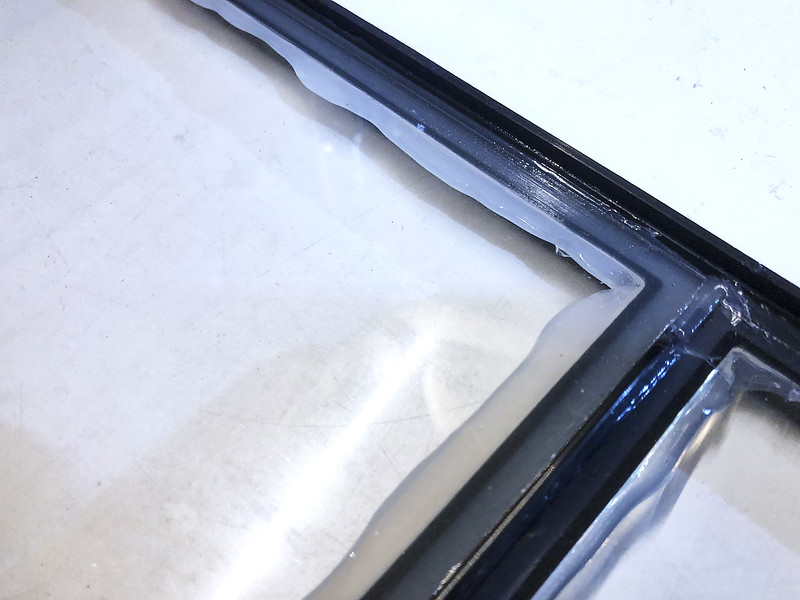 [url=https://flic.kr/p/2cehQYa]
 [url=https://flic.kr/p/2cehQpp]
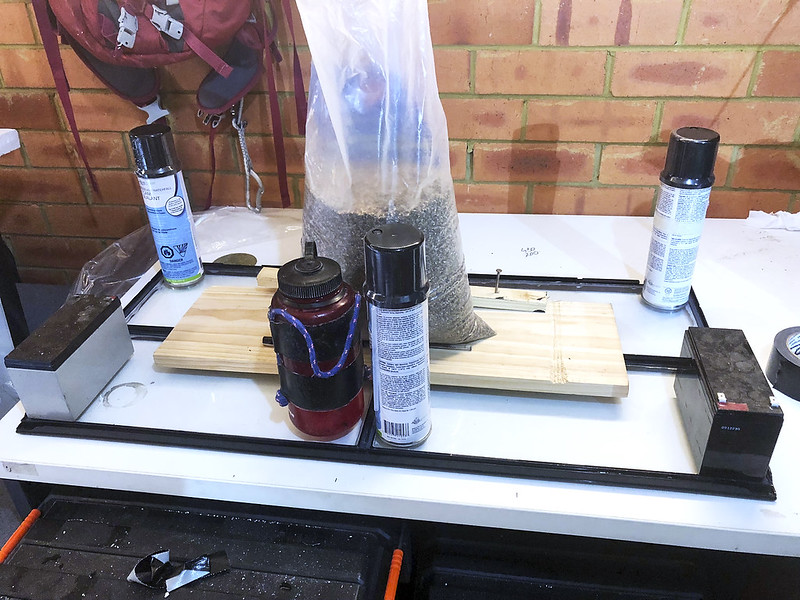
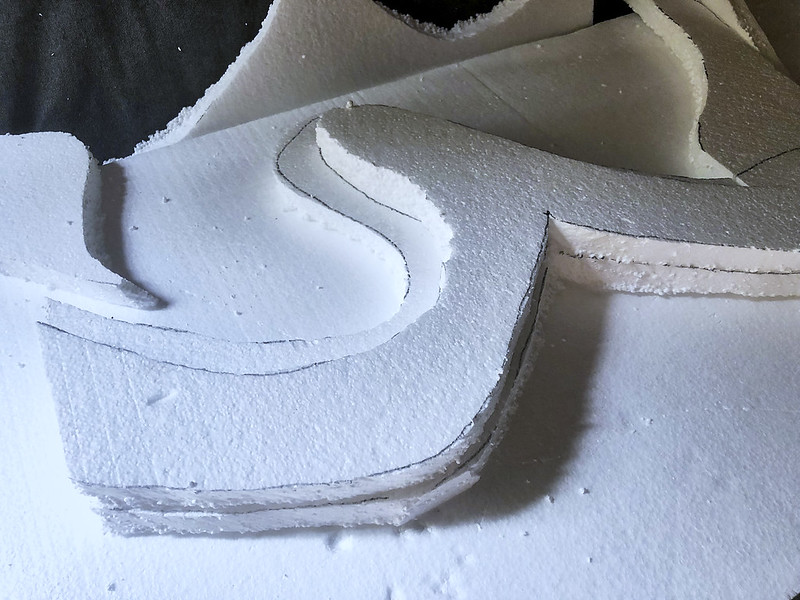
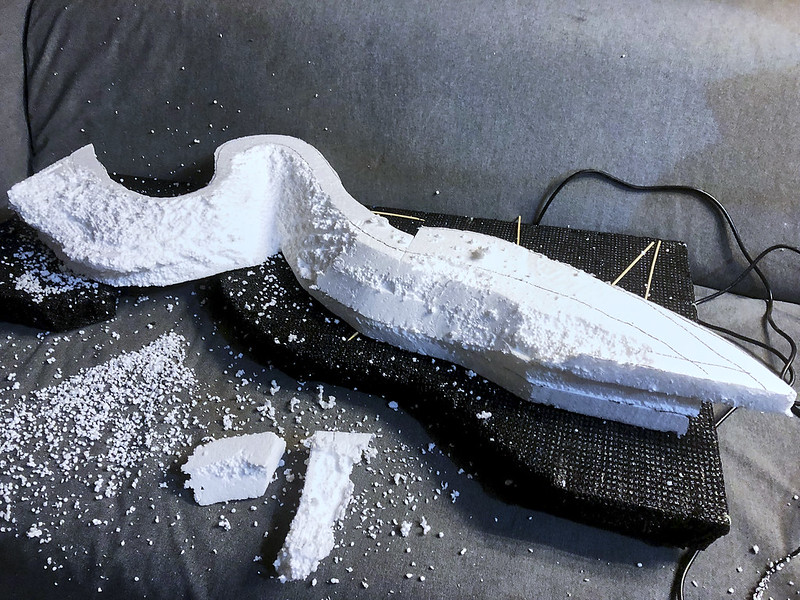
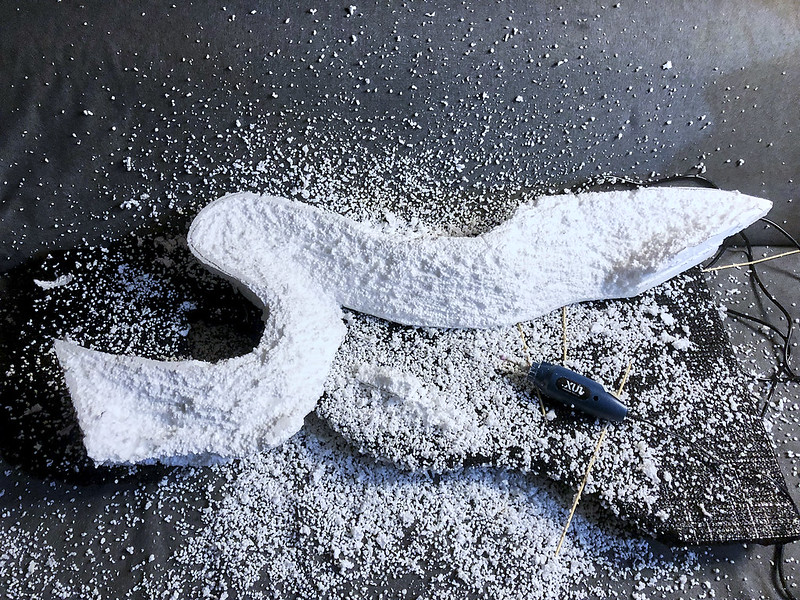
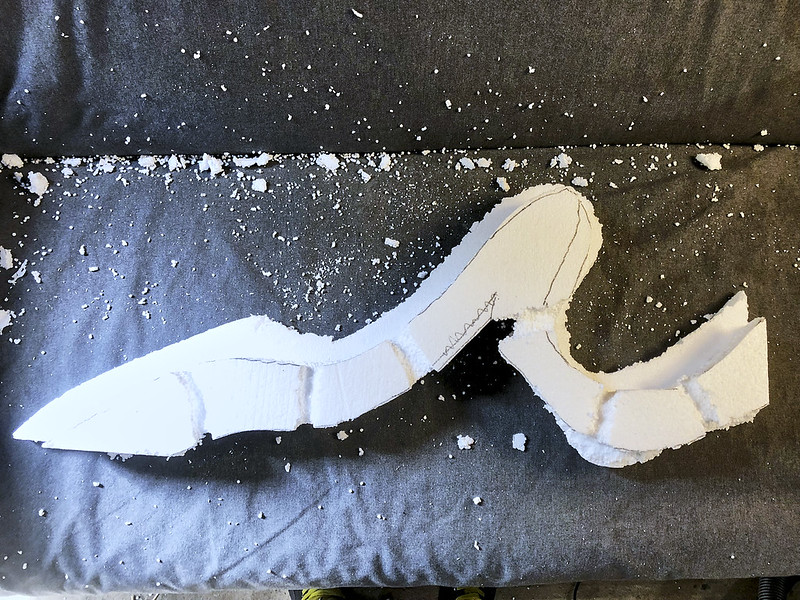
Polystyrene was cut and shaped for the 'river bank' section
 [url=https://flic.kr/p/Q8FvZ3]
 [url=https://flic.kr/p/2baF1Cb]
 [url=https://flic.kr/p/29vaRpw]
 [url=https://flic.kr/p/NvwDkr]
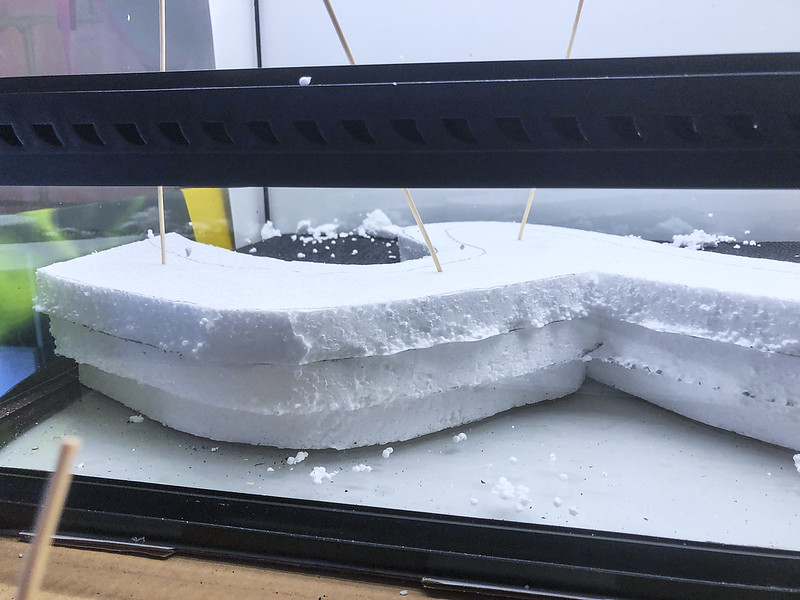
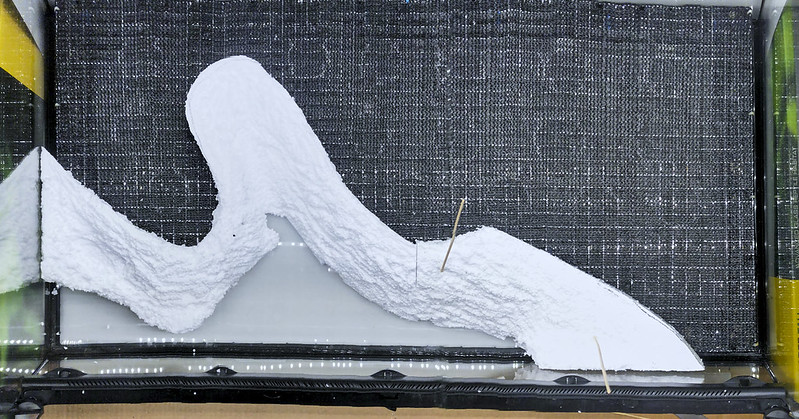
channels were cut into the base to allow water to pass from the false bottom to the front water section
 [url=https://flic.kr/p/29vaQGu]
 [url=https://flic.kr/p/2cgL1iM]
 [url=https://flic.kr/p/2cgL2w8]
 [url=https://flic.kr/p/2baETt1]
The bank was then covered in silicon and a mix of peat and gravel
[IMG] 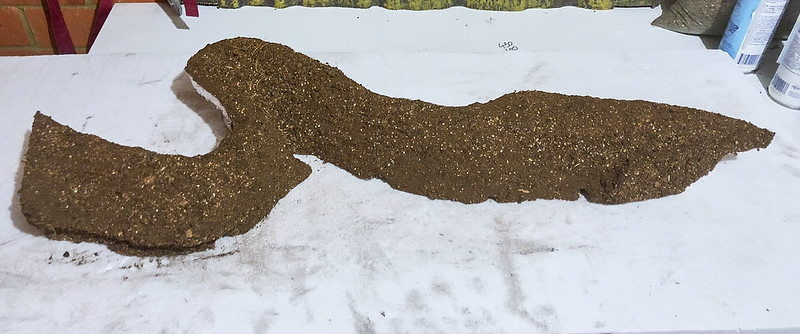 IMG_3808 2 IMG_3808 2 by David Burgess, on Flickr[/IMG]
Cork was glued directly to the glass walls with silicon
[IMG] 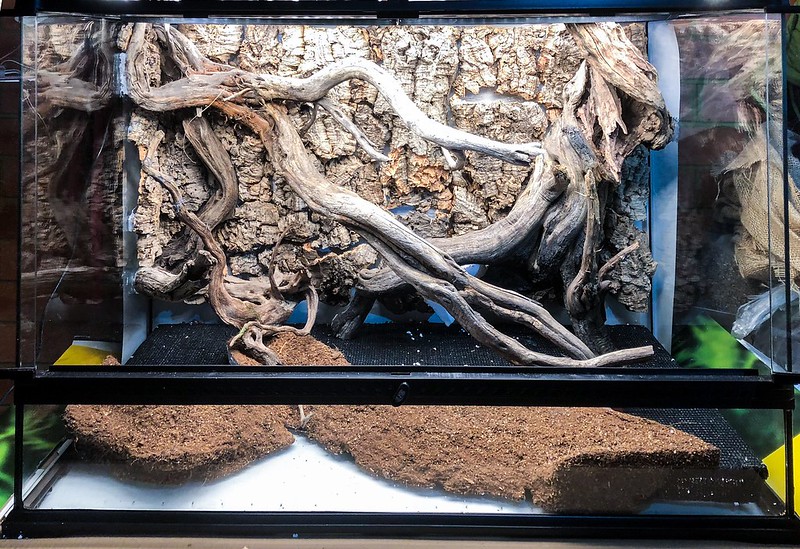 Untitled Untitled by David Burgess, on Flickr[/IMG]
Last edited by DTB; 11-20-2018 at 03:39 AM..
|
|
Post Thanks / Like - 2 Likes
|
|
|
|
|
11-19-2018, 09:57 PM
|
|
Jr. Member
|
|
Join Date: Oct 2018
Posts: 23
|
|
Love seeing the progress photos! Keep them coming!!
|
11-19-2018, 10:16 PM
|
|
Member
|
|
Join Date: May 2018
Posts: 59
|
|
Thanks Benno! This will be a quick build indeed, all the photos are already uploaded, ready to go. I just never got around to starting a thread 
---------- Post added at 02:16 PM ---------- Previous post was at 02:06 PM ----------
Oh, and this was the checked luggage coming back from Melbourne.....
[IMG] 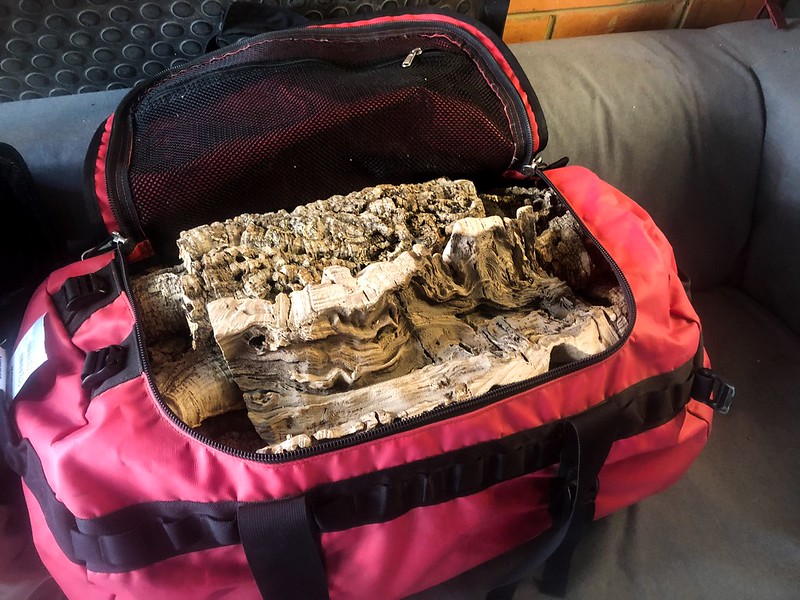 Untitled Untitled by David Burgess, on Flickr[/IMG]
hahaha, security didnt know what to do for awhile!!
and the carry on luggage....
[IMG] 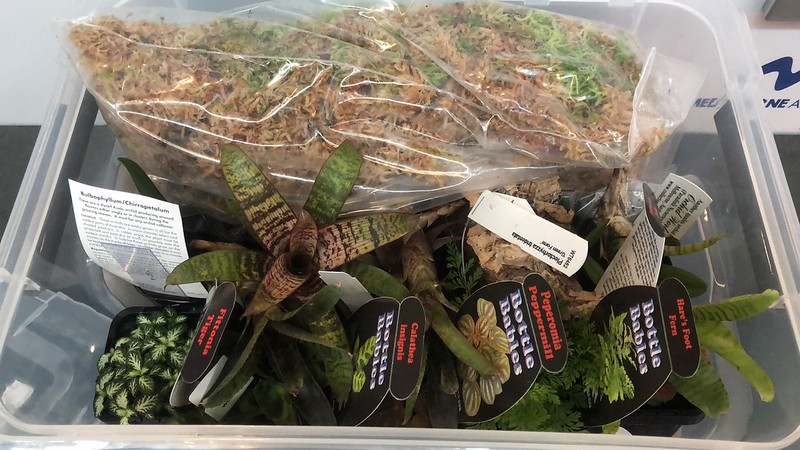 Untitled Untitled by David Burgess, on Flickr[/IMG]
the final result of a successful hunt
[IMG] 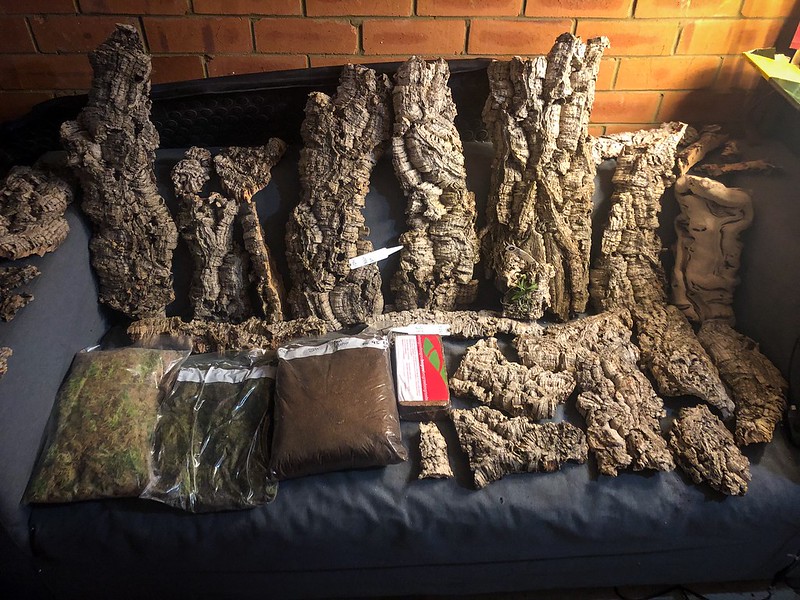 Untitled Untitled by David Burgess, on Flickr[/IMG]
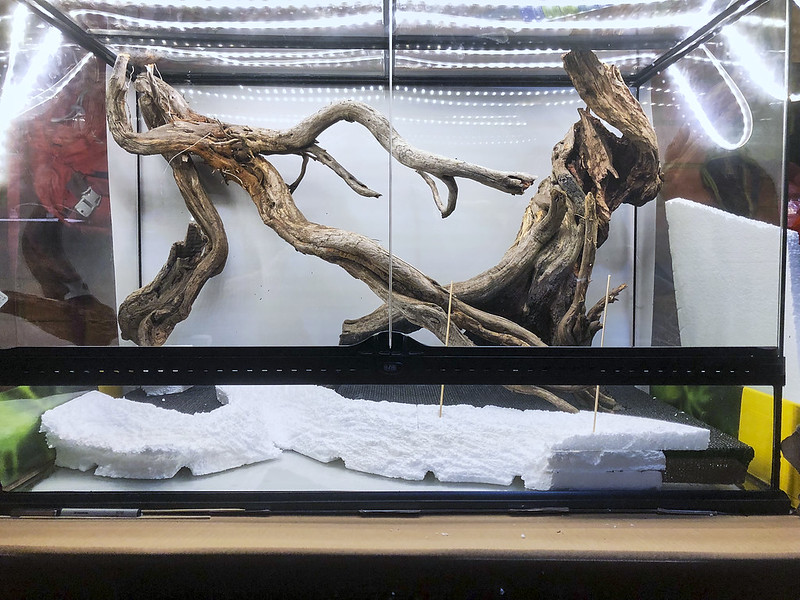
with the side walls in place, they just need to be sanded down to fit flush against the glass
[IMG] 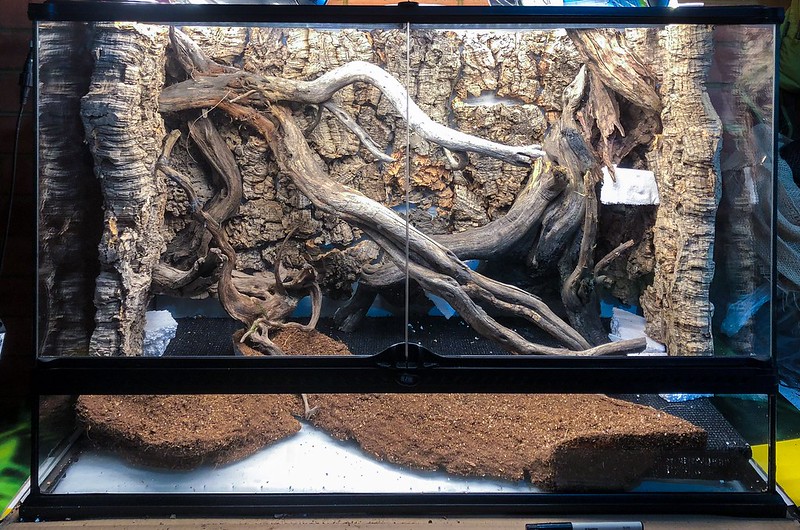 Untitled Untitled by David Burgess, on Flickr[/IMG] |
|
Post Thanks / Like - 1 Likes
|
|
|
|
|
11-19-2018, 10:16 PM
|
|
Jr. Member
|
|
Join Date: Oct 2018
Posts: 23
|
|
Quote:
Originally Posted by DTB

Thanks Benno! This will be a quick build indeed, all the photos are already uploaded, ready to go. I just never got around to starting a thread |
Yeah but I want to see it with plants and water in it |
11-19-2018, 11:05 PM
|
|
Member
|
|
Join Date: May 2018
Posts: 59
|
|
Then we got into building the cabinet and drilling the glass lid for the misting system.
[IMG] 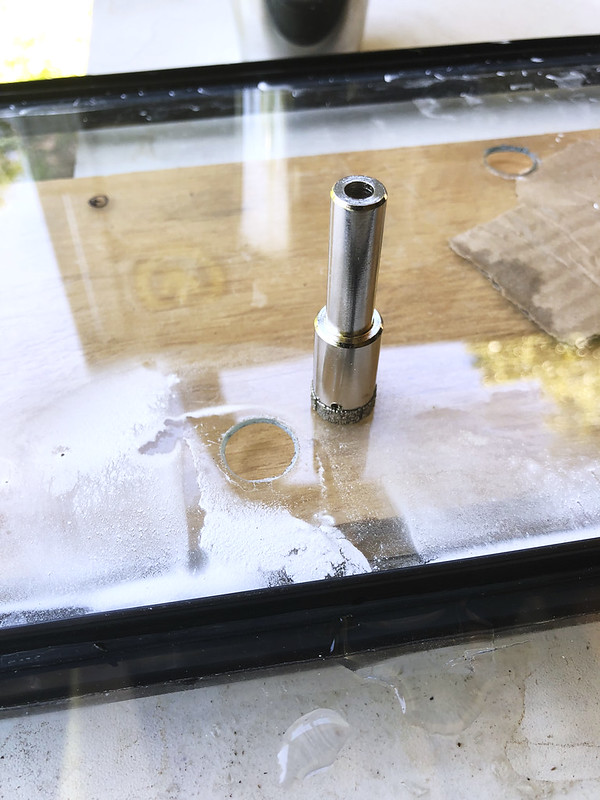 Vivarium_CabinetBuildDay_001 Vivarium_CabinetBuildDay_001 by David Burgess, on Flickr[/IMG]
[IMG]  Vivarium_CabinetBuildDay_002 Vivarium_CabinetBuildDay_002 by David Burgess, on Flickr[/IMG]
[IMG]  Vivarium_CabinetBuildDay_003 Vivarium_CabinetBuildDay_003 by David Burgess, on Flickr[/IMG]
[IMG] 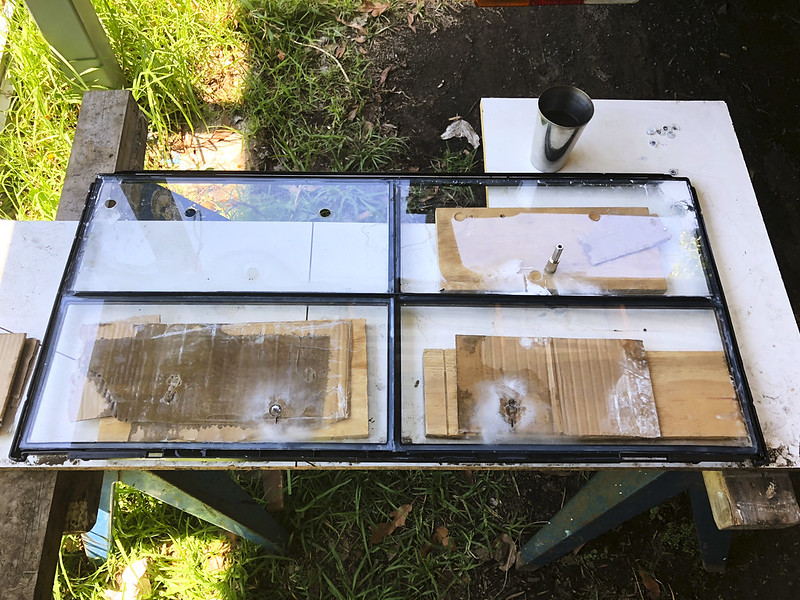 Vivarium_CabinetBuildDay_004 Vivarium_CabinetBuildDay_004 by David Burgess, on Flickr[/IMG]
[IMG] 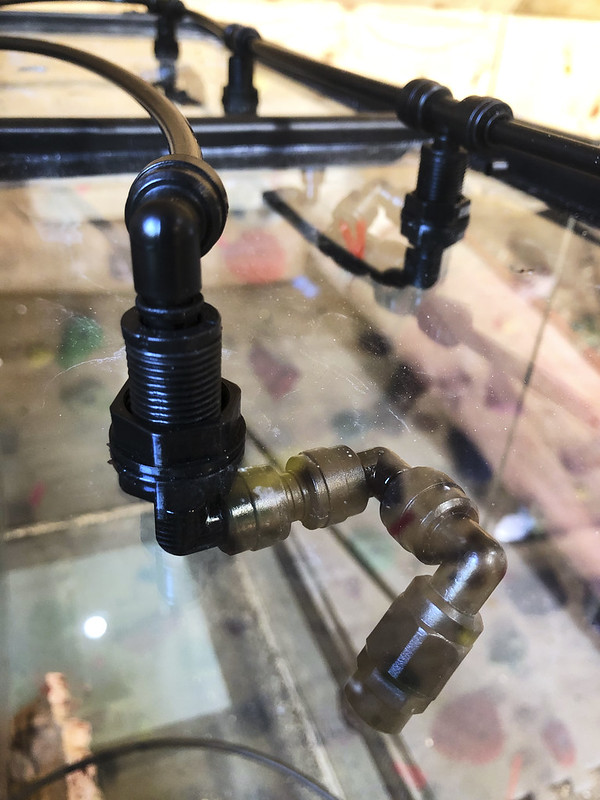 Vivarium_CabinetBuildDay_005 Vivarium_CabinetBuildDay_005 by David Burgess, on Flickr[/IMG]
[IMG] 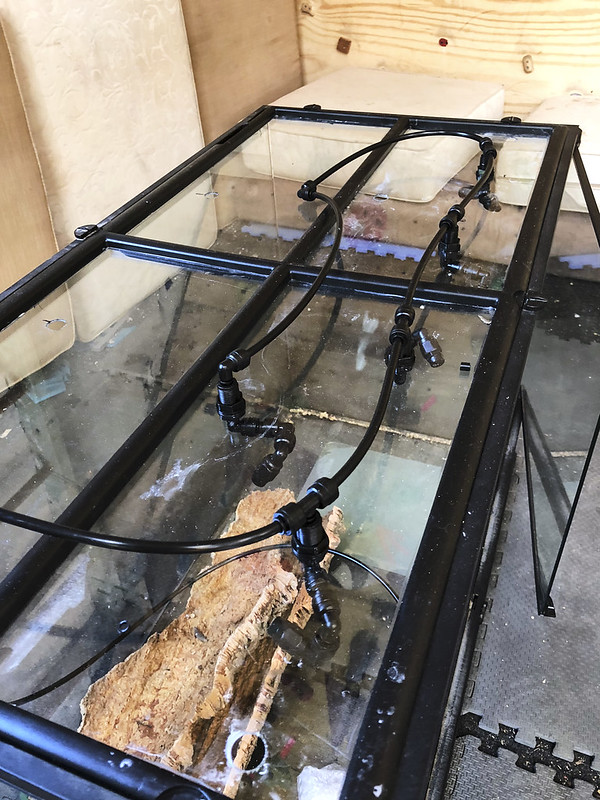 Vivarium_CabinetBuildDay_006 Vivarium_CabinetBuildDay_006 by David Burgess, on Flickr[/IMG]
while i was drilling, Jara from Kentville Carpentry in Galston (shameless plug for a very talented mate!) was putting together the cabinet....
[IMG] 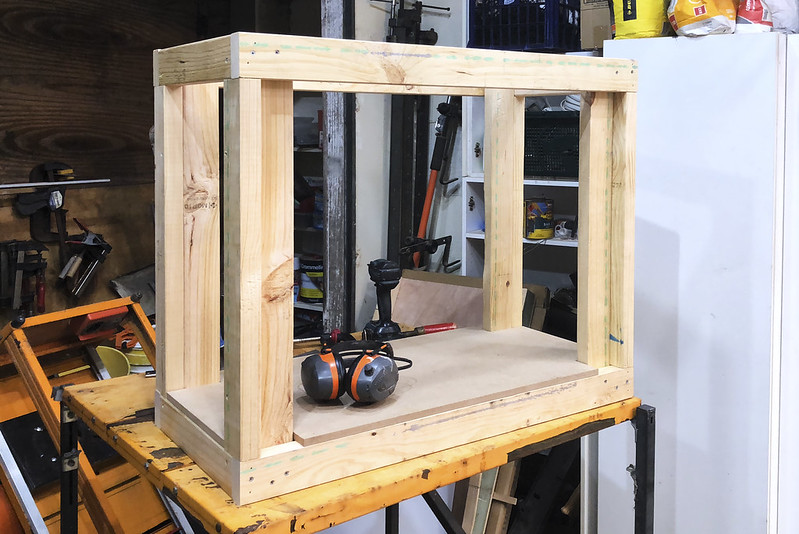 Vivarium_CabinetBuildDay_007 Vivarium_CabinetBuildDay_007 by David Burgess, on Flickr[/IMG]
[IMG] 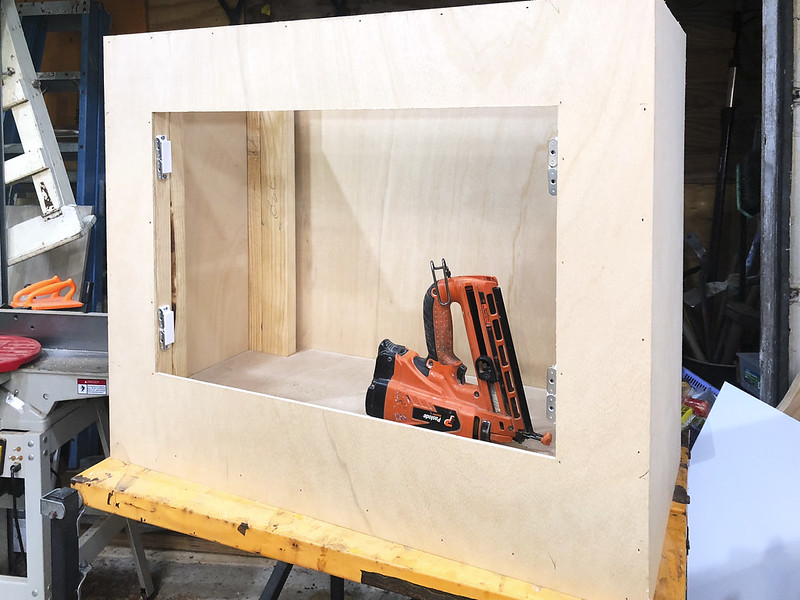 Vivarium_CabinetBuildDay_008 Vivarium_CabinetBuildDay_008 by David Burgess, on Flickr[/IMG]
[IMG] 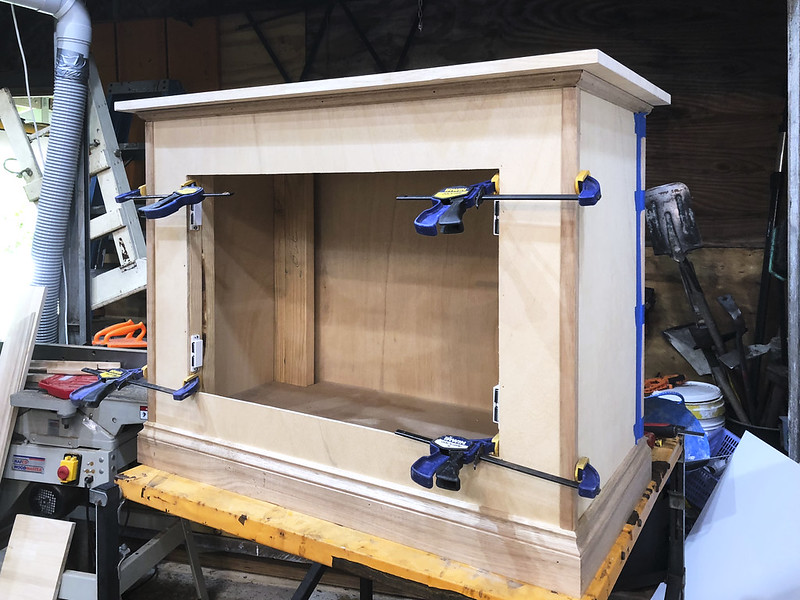 Vivarium_CabinetBuildDay_009 Vivarium_CabinetBuildDay_009 by David Burgess, on Flickr[/IMG]
[IMG] 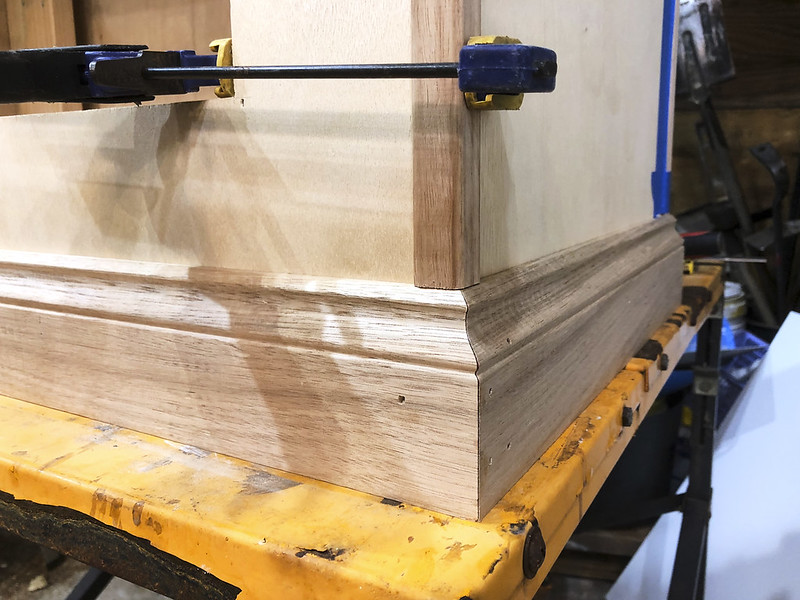 Vivarium_CabinetBuildDay_011 Vivarium_CabinetBuildDay_011 by David Burgess, on Flickr[/IMG]
[IMG] 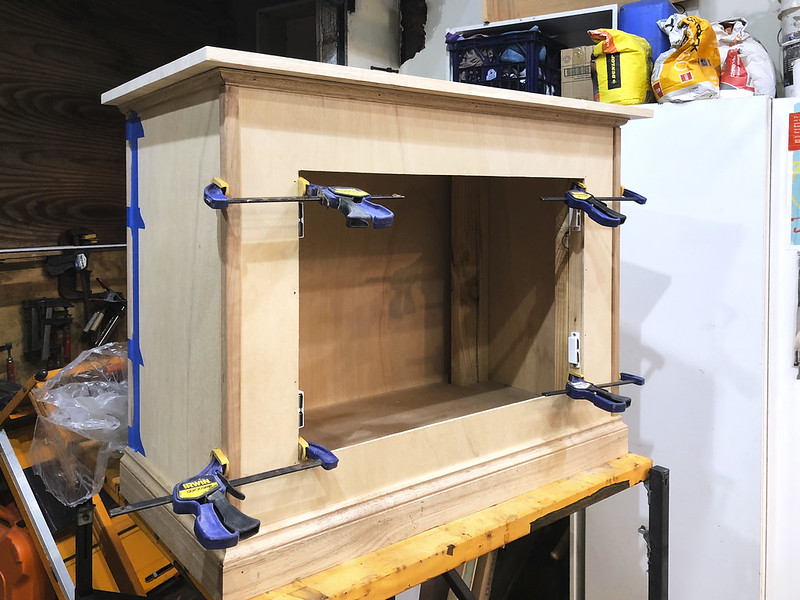 Vivarium_CabinetBuildDay_012 Vivarium_CabinetBuildDay_012 by David Burgess, on Flickr[/IMG]
[IMG] 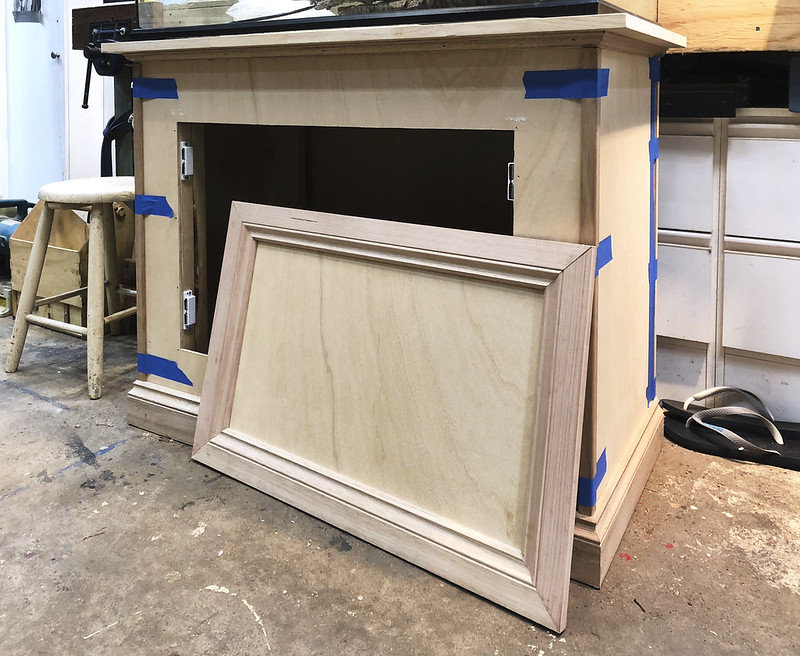 Vivarium_CabinetBuildDay_015 Vivarium_CabinetBuildDay_015 by David Burgess, on Flickr[/IMG]
[IMG] 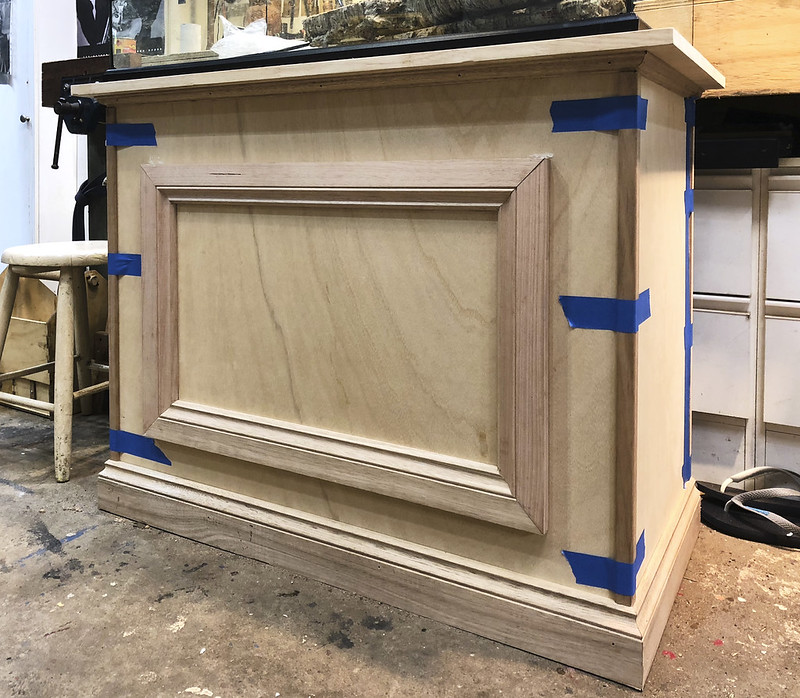 Vivarium_CabinetBuildDay_016 Vivarium_CabinetBuildDay_016 by David Burgess, on Flickr[/IMG]
[IMG] 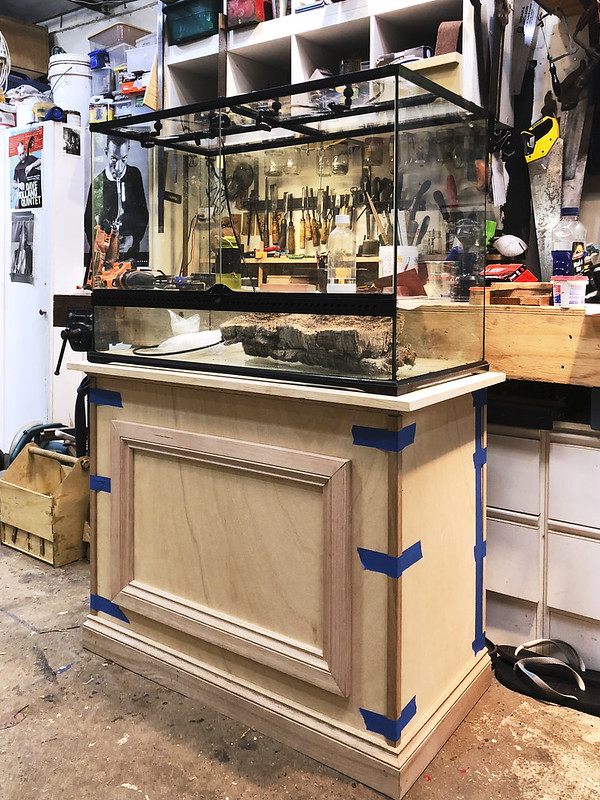 Vivarium_CabinetBuildDay_017 Vivarium_CabinetBuildDay_017 by David Burgess, on Flickr[/IMG]
I then applied a walnut stain to the whole thing and after 2 coats it turned out beautiful!!!
The hood is still to be built but will match the cabinet
[IMG] 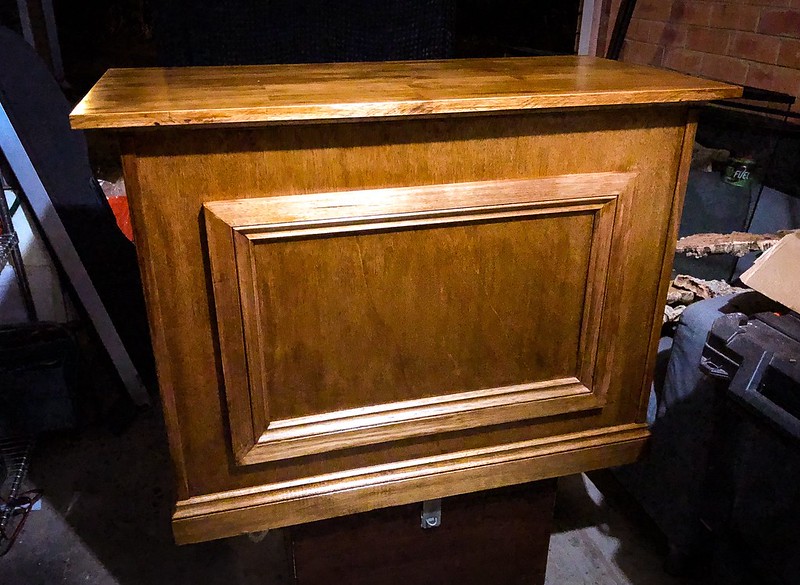 Untitled Untitled by David Burgess, on Flickr[/IMG]
---------- Post added at 02:30 PM ---------- Previous post was at 02:29 PM ----------
Quote:
Originally Posted by Benno
Yeah but I want to see it with plants and water in it |
haha, give me a couple of hrs. Im suppose to be working at the same time
---------- Post added at 02:35 PM ---------- Previous post was at 02:30 PM ----------
ok, this one is for Benno...
and then the water went in
[IMG] 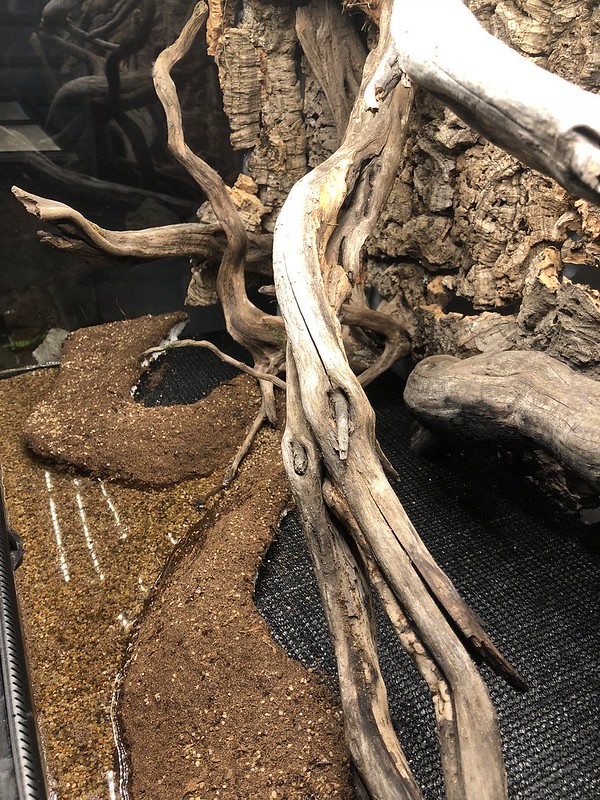 Untitled Untitled by David Burgess, on Flickr[/IMG]
[IMG] 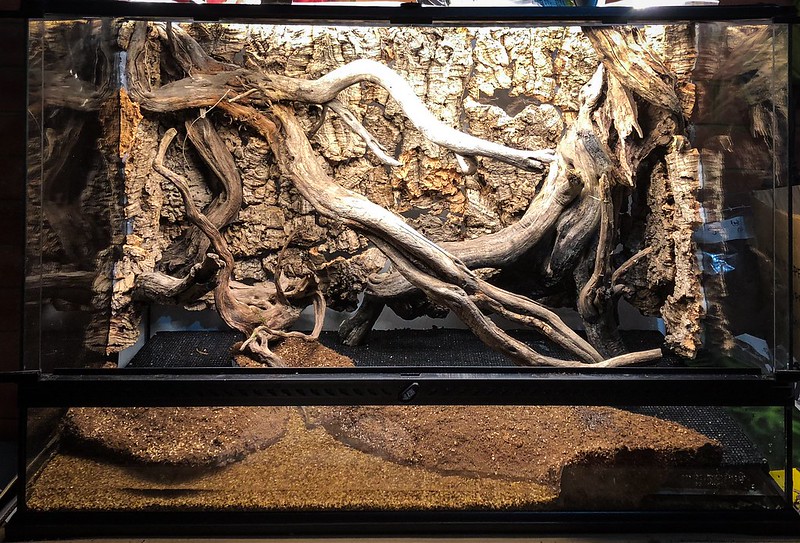 Untitled Untitled by David Burgess, on Flickr[/IMG]
---------- Post added at 02:46 PM ---------- Previous post was at 02:35 PM ----------
The tank and cabinet were then moved upstairs to its final position and the misting system, fans and electrics were plumbed in and attached.
[IMG] 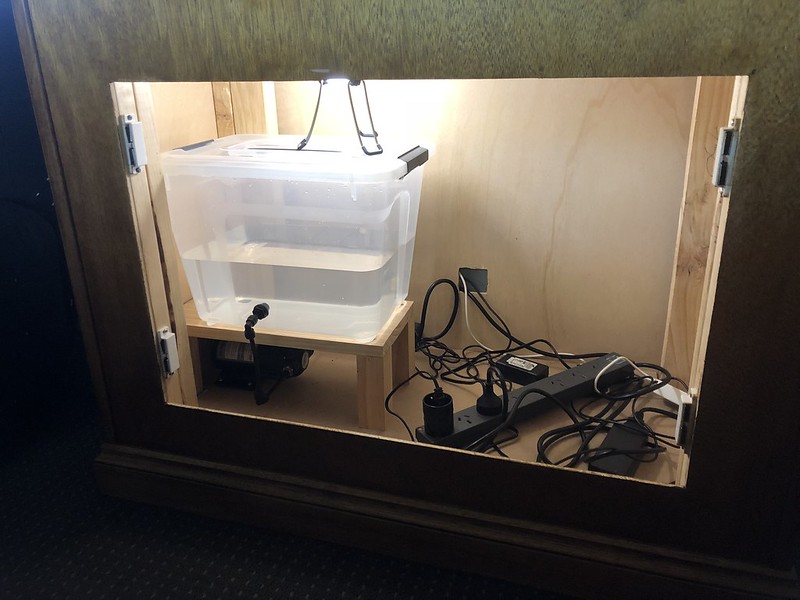 Untitled Untitled by David Burgess, on Flickr[/IMG]
[IMG] 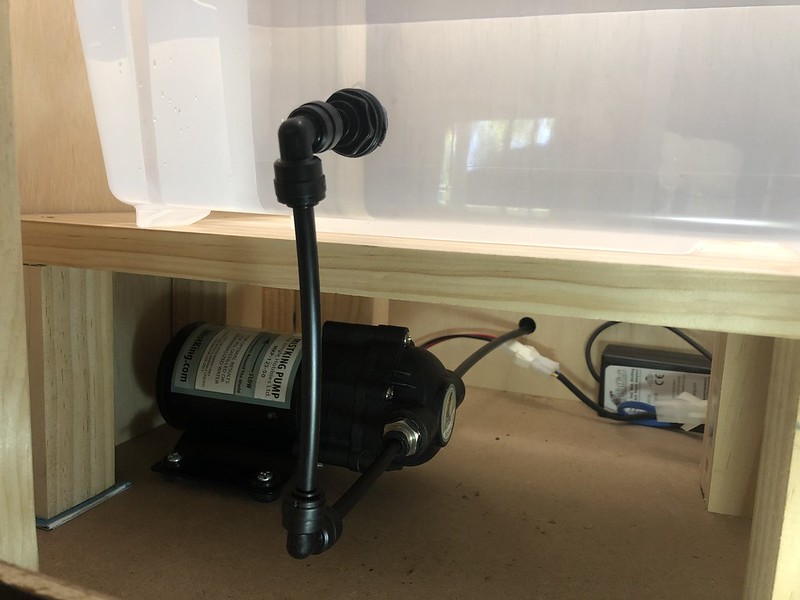 Untitled Untitled by David Burgess, on Flickr[/IMG]
[IMG] 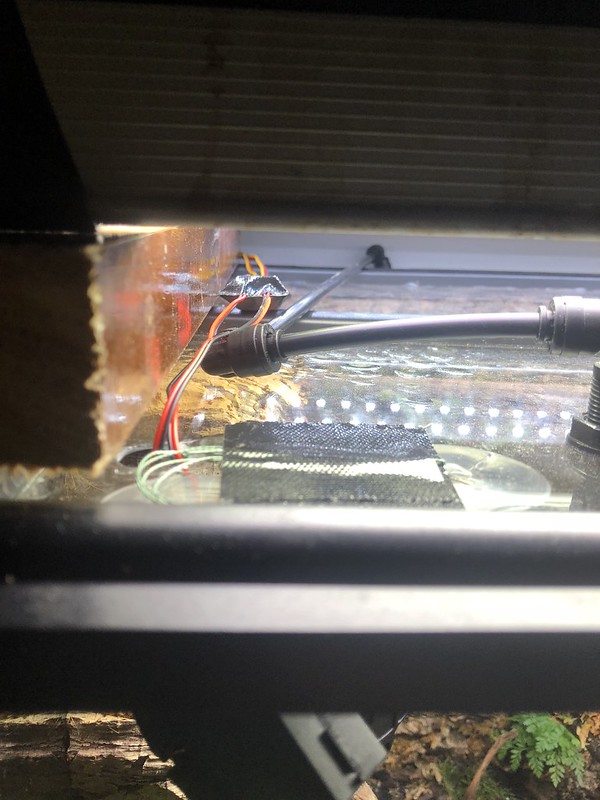 Untitled Untitled by David Burgess, on Flickr[/IMG]
[IMG] 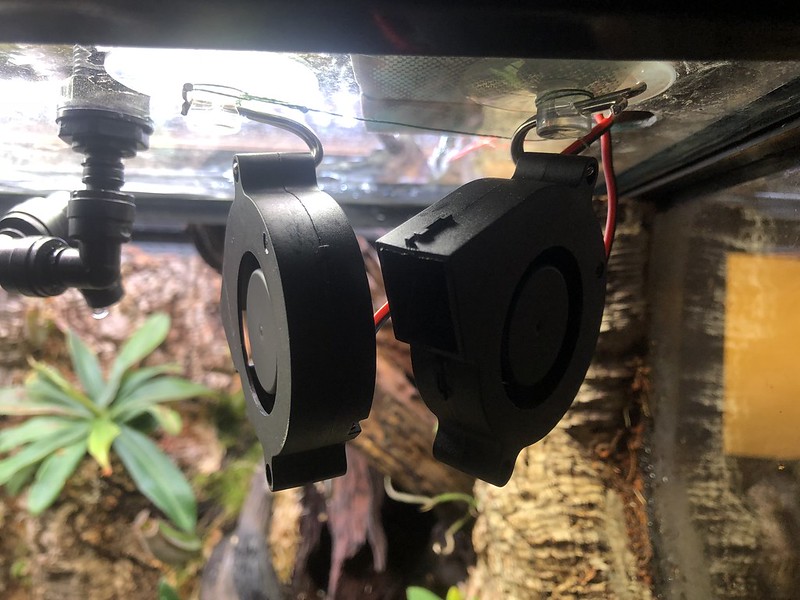 Untitled Untitled by David Burgess, on Flickr[/IMG]
[IMG] 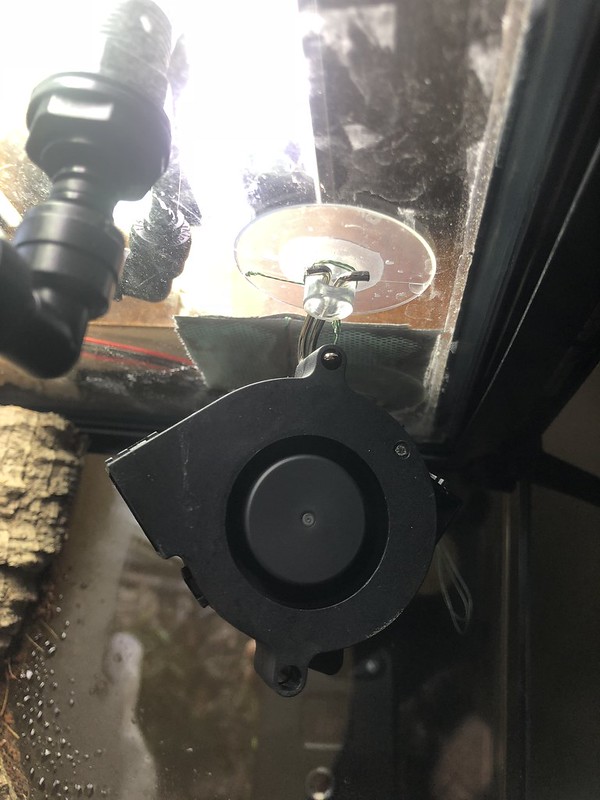 Untitled Untitled by David Burgess, on Flickr[/IMG]
the 4 fans have been connected to a 4 channel controller that allows me to adjust the speed of the fans as I work out the nuances of the tank (and the blue light is kinda cool)
[IMG] 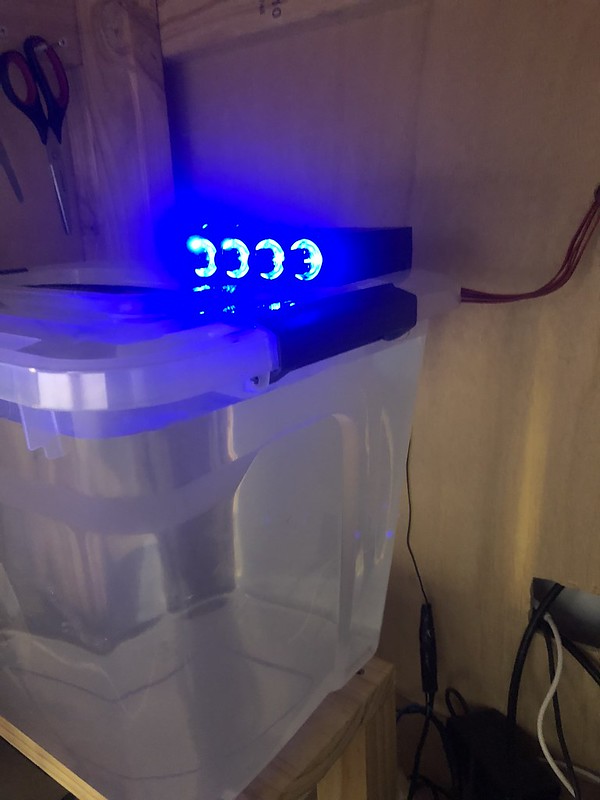 Untitled Untitled by David Burgess, on Flickr[/IMG]
Meanwhile, the plants were patiently waiting to go into their new home.....
[IMG] 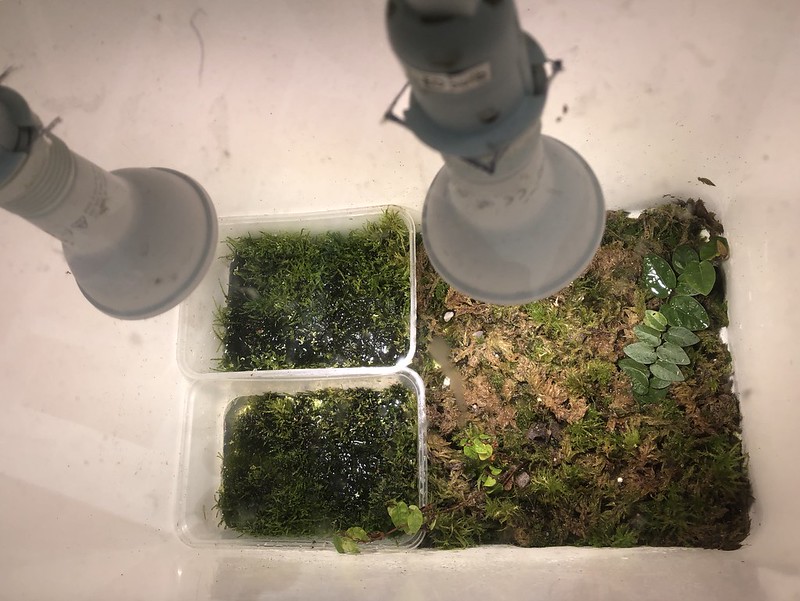 Untitled Untitled by David Burgess, on Flickr[/IMG]
I kept a fair amount of the aquatic plants from my aquarium, knowing that I could possibly grow them emersed in the wet area of the paludarium
[IMG] 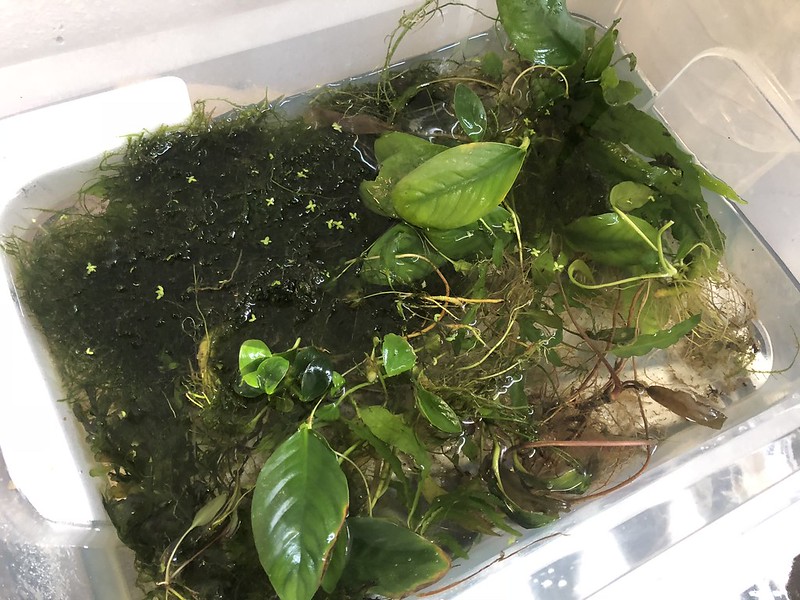 Untitled Untitled by David Burgess, on Flickr[/IMG]
[IMG] 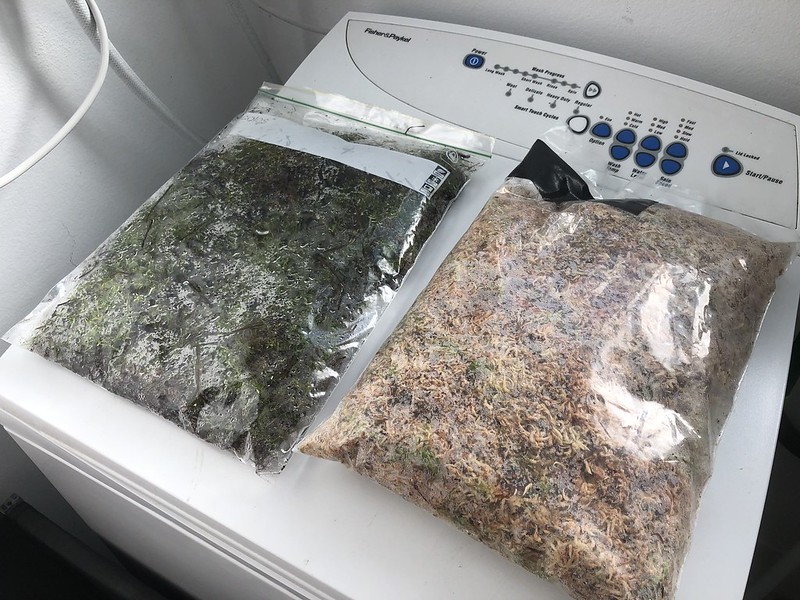 Untitled Untitled by David Burgess, on Flickr[/IMG]
[IMG] 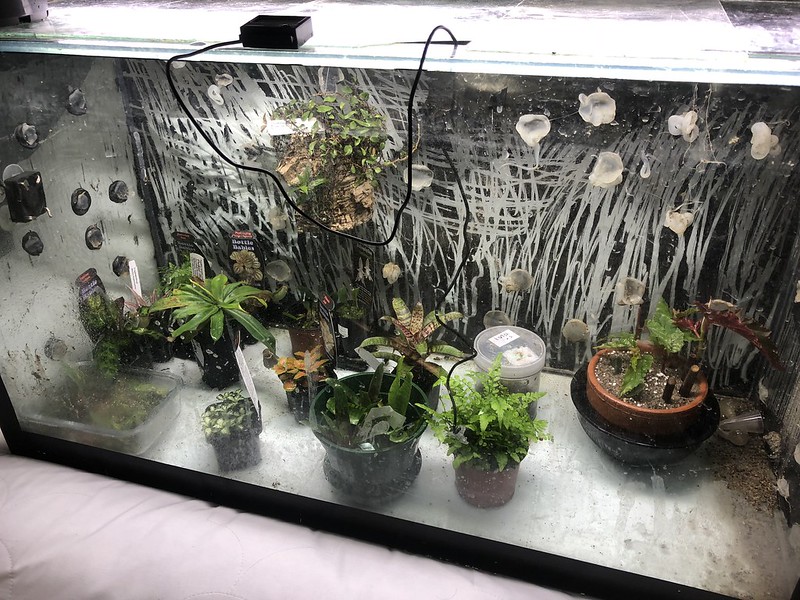 Untitled Untitled by David Burgess, on Flickr[/IMG]
---------- Post added at 03:00 PM ---------- Previous post was at 02:46 PM ----------
the gaps in the back wall were filled with live sphagnum moss
[IMG]  Untitled Untitled by David Burgess, on Flickr[/IMG]
[IMG] 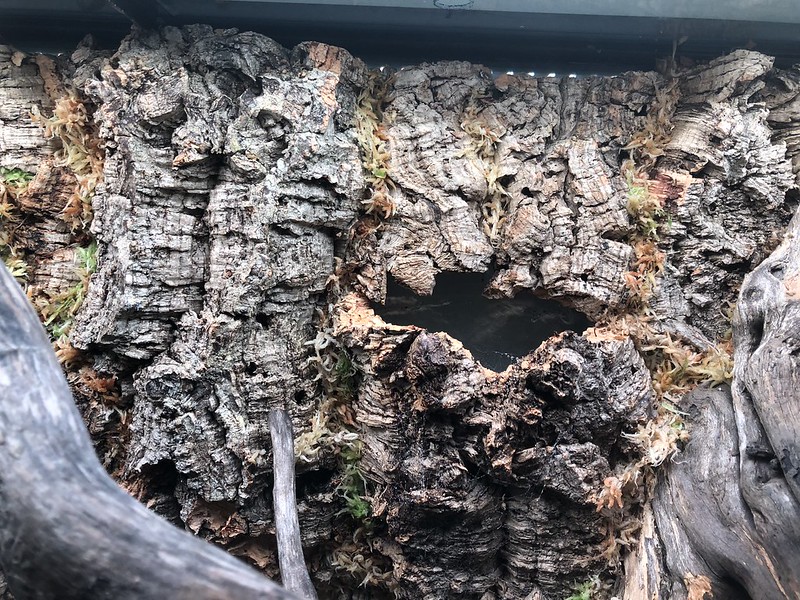 Untitled Untitled by David Burgess, on Flickr[/IMG]
aquatic plants were added....
[IMG] 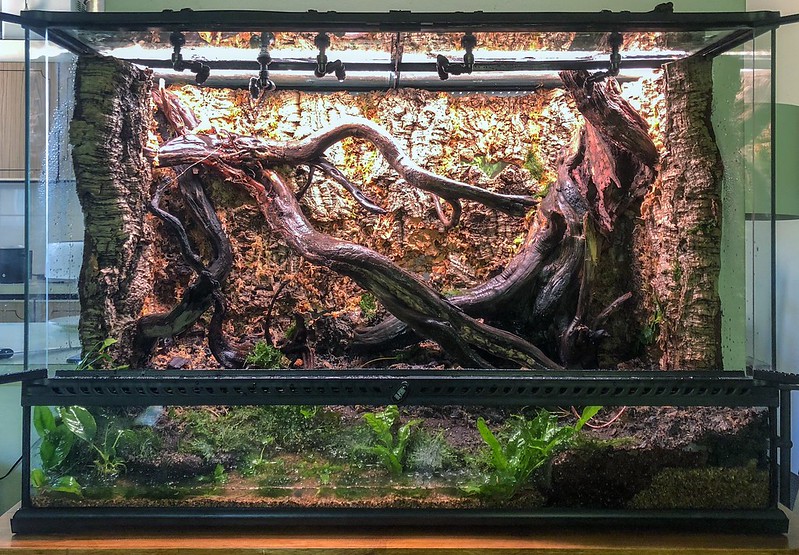 Untitled Untitled by David Burgess, on Flickr[/IMG]
[IMG] 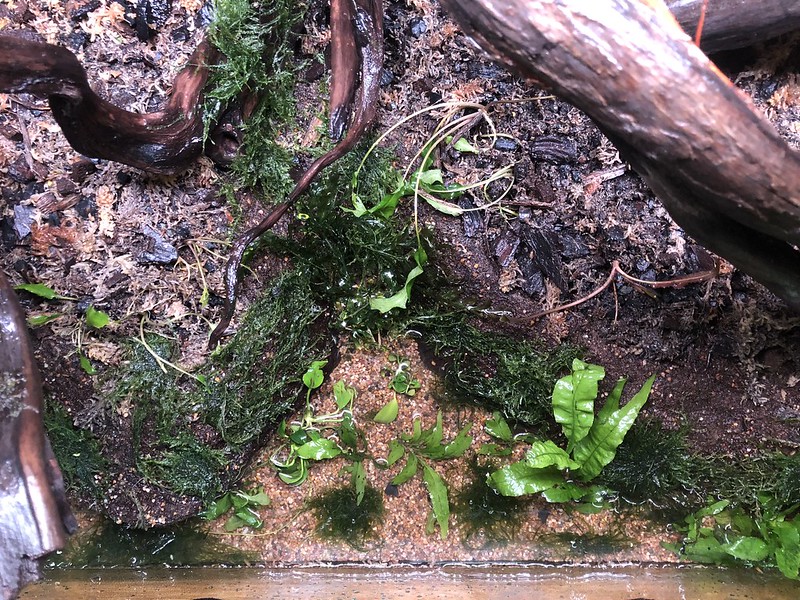 Untitled Untitled by David Burgess, on Flickr[/IMG]
then the soil, isopods and springtails
[IMG] 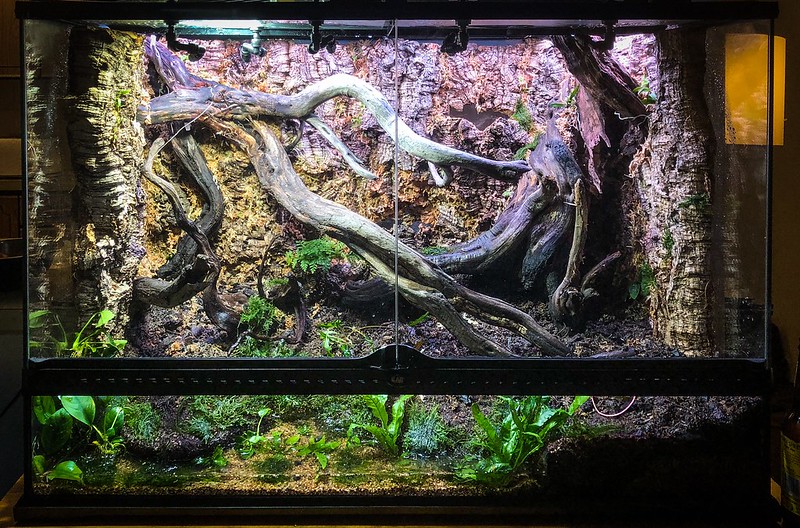 Untitled Untitled by David Burgess, on Flickr[/IMG]
[IMG]  Untitled Untitled by David Burgess, on Flickr[/IMG]
[IMG] 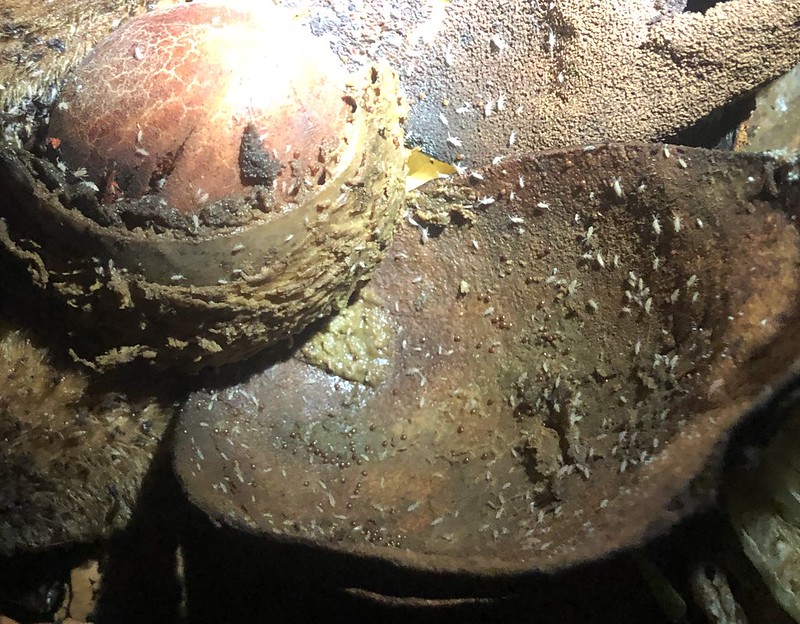 Untitled Untitled by David Burgess, on Flickr[/IMG]
Oh, because I wasnt sure about the suction cups for the fans, I added a safety tether so they don't end up flying around or fall in the water. I may change the fan setup in the future
[IMG] 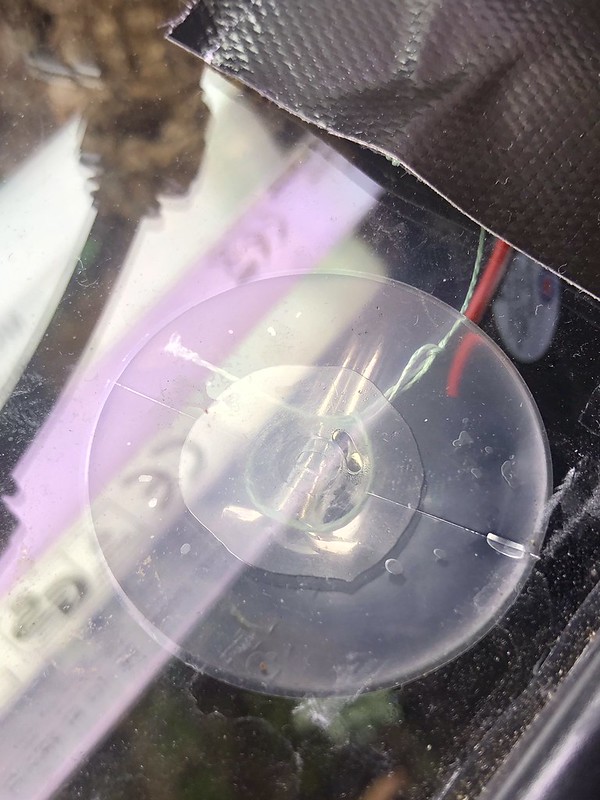 by David Burgess, on Flickr[/IMG]
[IMG] 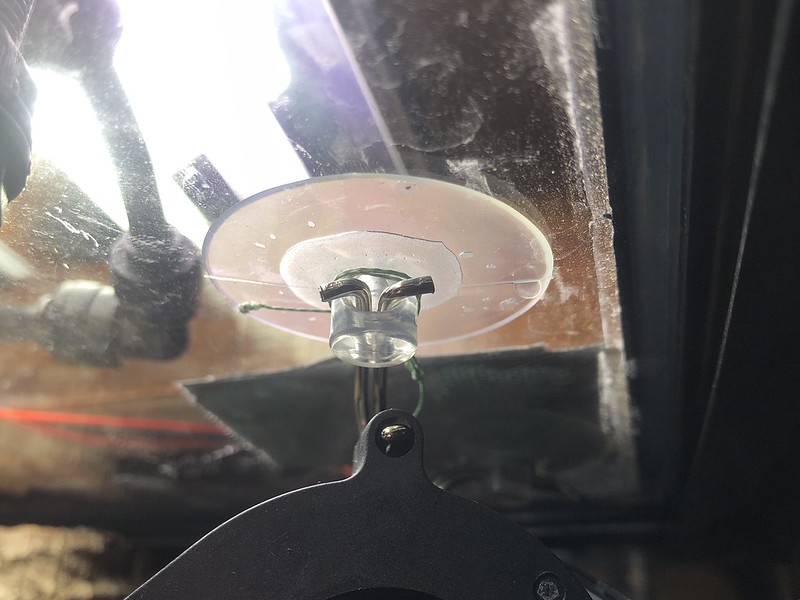 Untitled Untitled by David Burgess, on Flickr[/IMG]
[IMG]  Untitled Untitled by David Burgess, on Flickr[/IMG]
---------- Post added at 03:05 PM ---------- Previous post was at 03:00 PM ----------
and now for some fun!! I added a DIY fog machine for some visual effect. It was a bit of a folly for sure but it was really fun working it out and building it. It actually works pretty well.
[IMG] 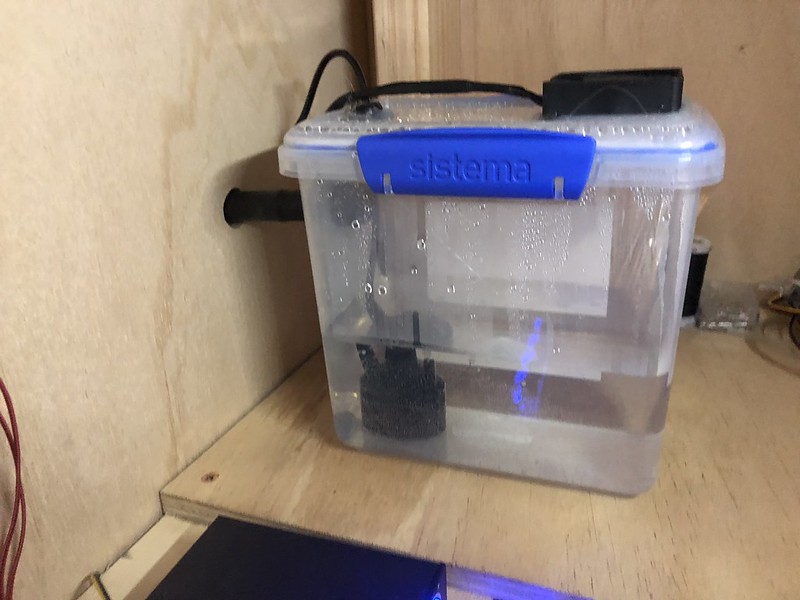 Untitled Untitled by David Burgess, on Flickr[/IMG]
[IMG]  Untitled Untitled by David Burgess, on Flickr[/IMG]
and is plumbed into the back right corner so the fog cascades over and down the tree root and fills the tank
[IMG] 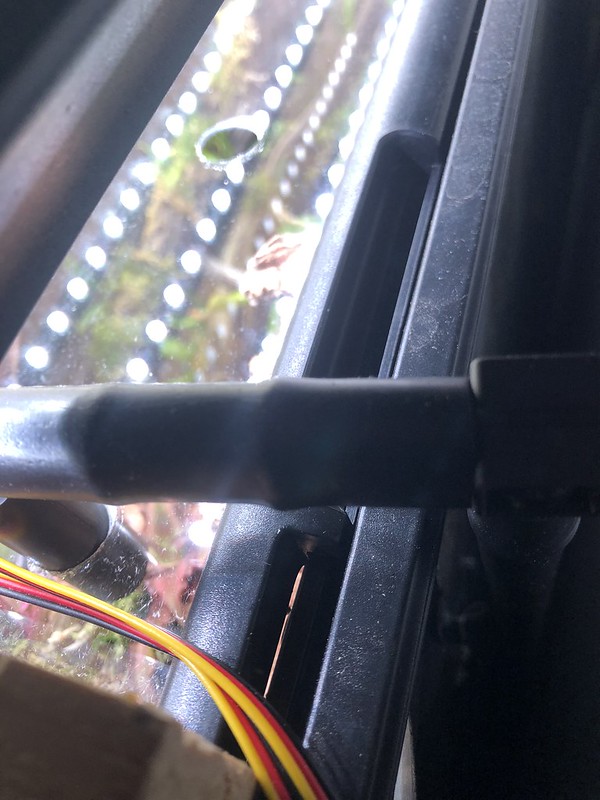 Untitled Untitled by David Burgess, on Flickr[/IMG]
and then the real fun began....
[IMG] 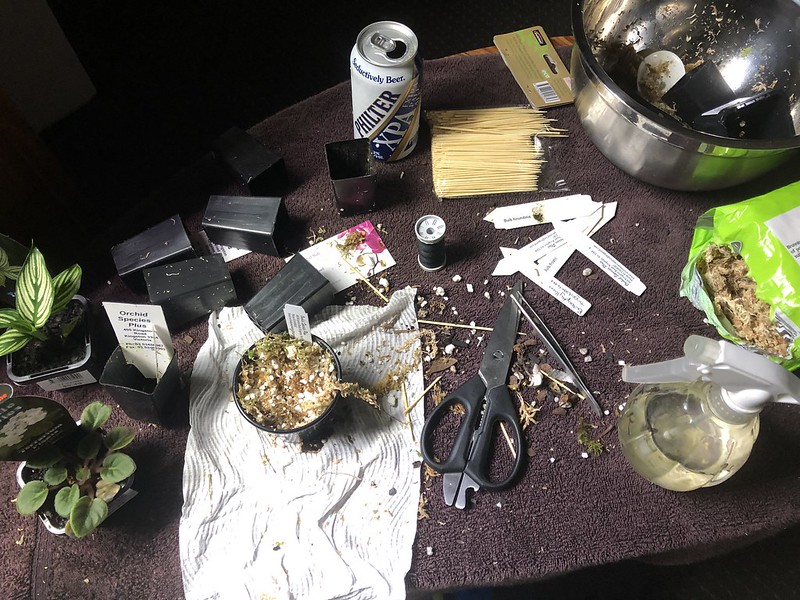 Untitled Untitled by David Burgess, on Flickr[/IMG]
|
|
|
|
|
Mistking
|
Looking for a misting system? Look no further. Automated misting systems from MistKing are used by multitude of plant enthusiasts and are perfect for Orchids. Systems feature run dry pumps, ZipDrip valve, adjustable black nozzles, per second control! Automatically mist one growing shelf or a greenhouse full of Orchids.
See MistKing testimonials |
|
|
|
|
|
Last edited by DTB; 11-20-2018 at 03:42 AM..
|
|
Post Thanks / Like - 2 Likes
|
|
|
|
|
11-19-2018, 11:08 PM
|
|
Jr. Member
|
|
Join Date: Oct 2018
Posts: 23
|
|
Keep it going, you are giving me a reason to continue living while I'm at work... Which bit of Aus are you in and how much do you think it has cost all up so far? I wish I had room for one of these  |
11-19-2018, 11:28 PM
|
|
Member
|
|
Join Date: May 2018
Posts: 59
|
|
[IMG] 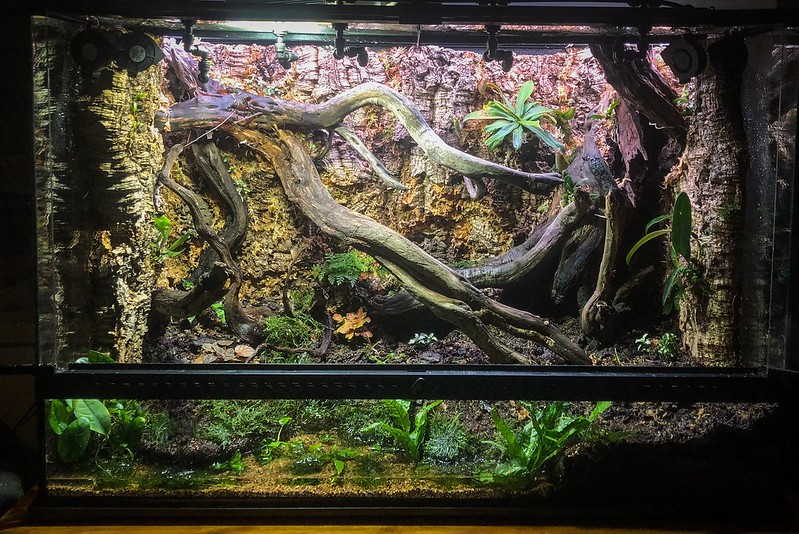 Untitled Untitled by David Burgess, on Flickr[/IMG]
[IMG] 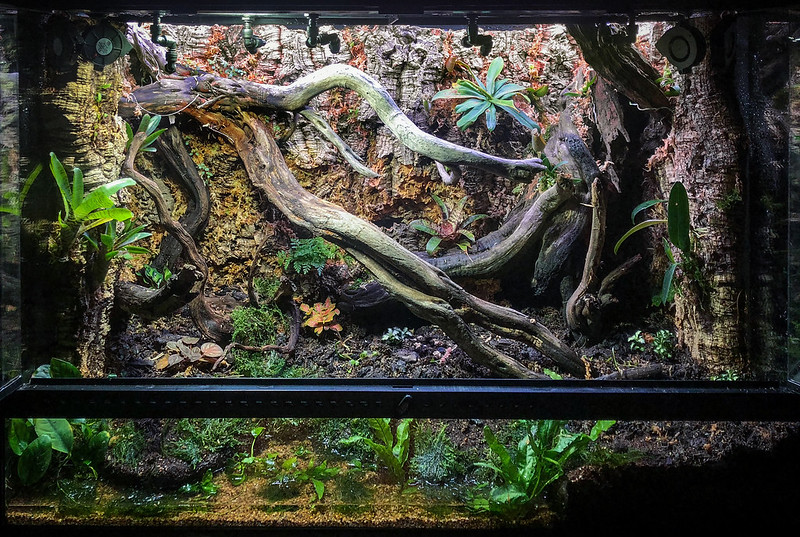 Untitled Untitled by David Burgess, on Flickr[/IMG]
[IMG]  Untitled Untitled by David Burgess, on Flickr[/IMG]
---------- Post added at 03:24 PM ---------- Previous post was at 03:12 PM ----------
I was waiting on the final 2 orchid ordered and they arrived on the same day so it was a big night winding plants to timber, pinning others to the cork and laying the Bush moss over the exposed soil. I am really happy with the final result, everything balances really well (well, to me at least) I have planted the orchids in small groups to give the tank a more natural look and hopefully this will show well if they every flower.
[IMG] 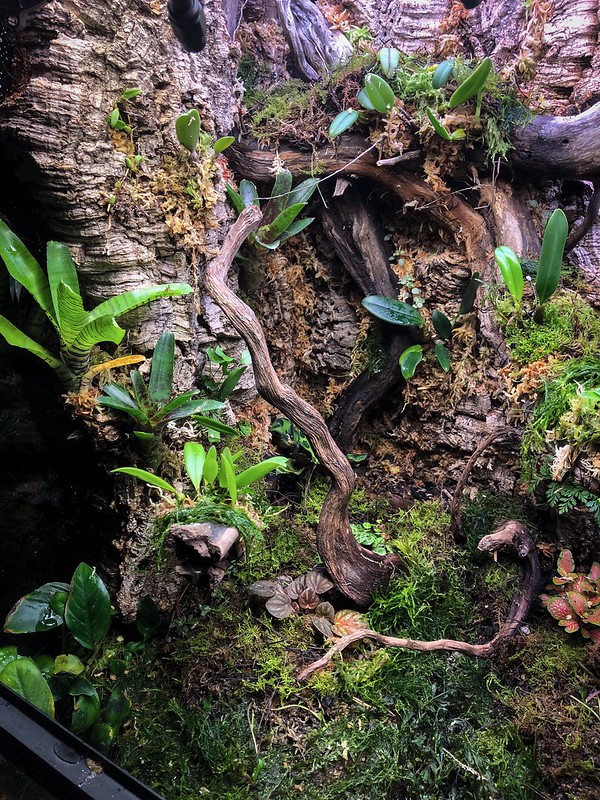 Untitled Untitled by David Burgess, on Flickr[/IMG]
[IMG] 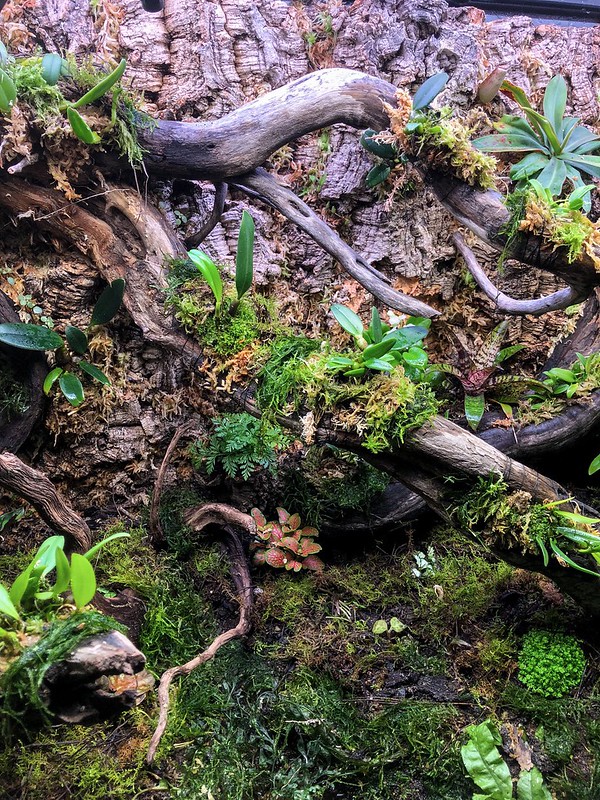 Untitled Untitled by David Burgess, on Flickr[/IMG]
[IMG] 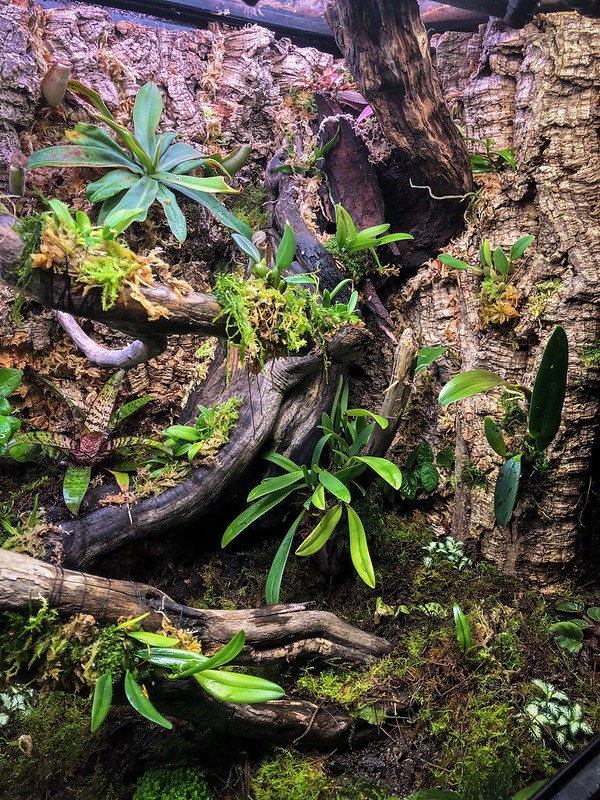 Untitled Untitled by David Burgess, on Flickr[/IMG]
[IMG] 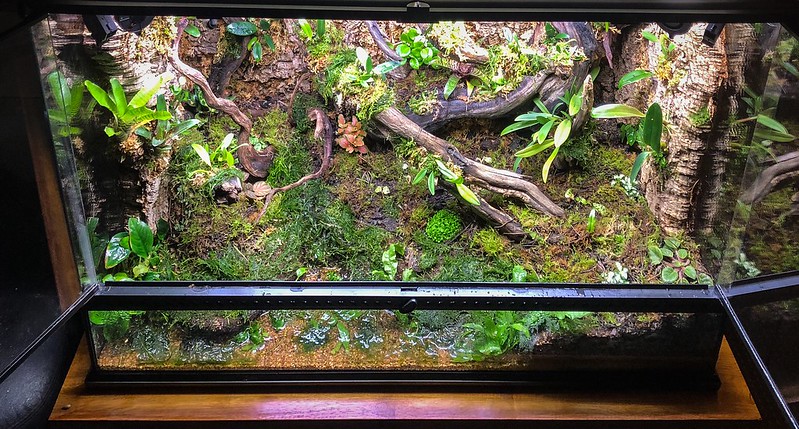 Untitled Untitled by David Burgess, on Flickr[/IMG]
these were taken about an hr after planting but i think it is looking pretty good so far. Ill take another photo in a few weeks to compare and see how everything is settling in.. or struggling.
[IMG] 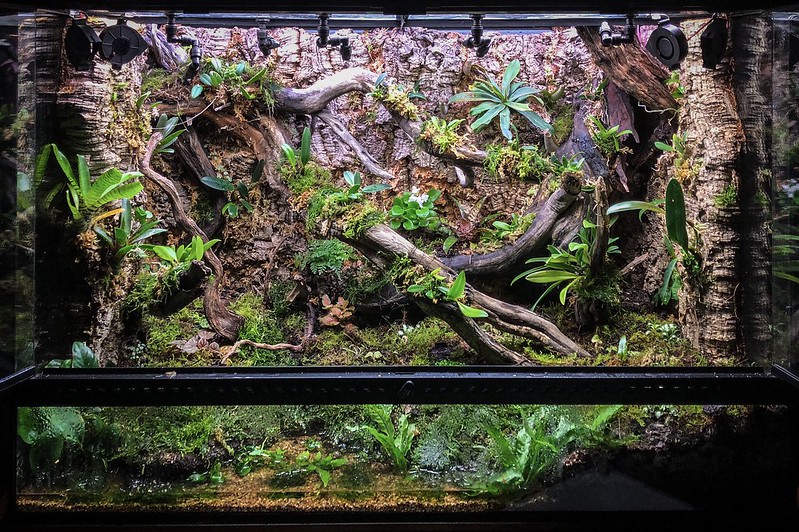 Untitled Untitled by David Burgess, on Flickr[/IMG]
---------- Post added at 03:26 PM ---------- Previous post was at 03:24 PM ----------
Here is the complete list of plants used:
bulbophyllum ramosii
bulbophyllum tingabarinum
bulbophyllum frostii
bulbophyllum ambrosia
bulbophyllum purpuraceum
bulbophyllum hirundinis
bulbophyllum alagense
bulbophyllum dayanum 'red'
bulbophyllum lasiochilum dark
bulbophyllum pardalotum
macodes petola
plectorhyzza tridentala (tangle orchid)
pepperomia 'peppermill'
pepperomia prostrata
neoregelia wild tiger
neoregelia tigrina
vriesea red chestnut
cryptanthus 'marian oppenheimer'
cryptanthus earth stars
nepenthes albomarginata
calathea insignis 'rattlesnake plant'
fittonia 'tiger'
fittonia 'jade'
mini african violet "ballet snowcone"
mini african violet trailing form
viola hederacea "aust native violet'
davallia canariensis 'hares foot fern'
anubius barteri
cryptocoryne wendtii
bolbitis heudelotii
sphagnum moss
selaginella apode
taxiphyllum barbieri 'java moss'
vesicularia montagnei 'xmas moss'
bush moss
Pheeewww! Thats a 3 month build in a day, I feel like I just lived through it all over again! Im exhausted, hahaha! Hope everyone enjoys the journey. Im really excited to see how the tank develops from here.
Please, any comments, potential problems that anyone can identify and suggestions are always greatly appreciated.
Happy growing!!
Last edited by DTB; 11-20-2018 at 12:11 AM..
|
|
Post Thanks / Like - 2 Likes
|
|
|
|
|
11-20-2018, 03:31 AM
|
|
Member
|
|
Join Date: May 2018
Posts: 59
|
|
Quote:
Originally Posted by Benno
Keep it going, you are giving me a reason to continue living while I'm at work... Which bit of Aus are you in and how much do you think it has cost all up so far? I wish I had room for one of these |
True that, how hard are Tuesdays!!
Im based in Sydney and I can tell you the exact amount it has cost me. Ive kept a detailed costing for the build, a little OCD, but well worth it. I did it with my last build and I found it really helpful ( and damn scary!!!) to work out where I could save money and be smarter with my builds, which meant more money able to be spent on plants which is what the whole thing was about.
So far, this baby has cost me......
oh god, this is going to hurt.......
I can't look......
$2,681.98 Aud
... urgh! that stings so bad!
I haven't worked out the percentage cost yet so some of that will carry over into any new tanks but it does add up building these things in Australia!
This is the total cost of the tank finished as ive included the parts that are currently in delivery and Ive already purchased the timber to build the hood.
Luckily I have a wonderful partner that appreciates them and understands that they are a long term investment
I tried to buy the best quality parts I could as this will be a show piece in my home for the next 5-10 years hopefully. Im sure the same could be built for much less.
As to the details of the tank schedule, they are as follows:
lights running from 11am to 11 pm
12 hrs
2 x hoT5 aquarium tubes
1 x 6500k LED light
(both soon to be swapped for 4 x 13w Jungle Dawns)
The 4 fans run 23 hrs a day
3 on the glass and 1 on the plants
The fogger runs for 1 hr from 6pm till 7pm
(for visual fun) and the fans stop for that hr
The mister runs for 20 seconds at 1am and 7pm everyday.
Last edited by DTB; 11-20-2018 at 03:48 AM..
|
|
Post Thanks / Like - 1 Likes
|
|
|
|
|
11-20-2018, 03:57 AM
|
|
Jr. Member
|
|
Join Date: Oct 2018
Posts: 23
|
|
That is so cool. Good job!
|
|
Post Thanks / Like - 1 Likes
|
 DTB
DTB liked this post
|
|
|
|
Currently Active Users Viewing This Thread: 1 (0 members and 1 guests)
|
|
|
| Thread Tools |
|
|
| Display Modes |
Rate This Thread |
 Linear Mode Linear Mode
|
|
 Posting Rules
|
You may not post new threads
You may not post replies
You may not post attachments
You may not edit your posts
HTML code is Off
|
|
|
All times are GMT -4. The time now is 03:16 AM.
|


